Solving Problems 77
Uninstalling Your Scanner Software
If you need to uninstall EPSON Scan, follow the instructions below. Be sure to
remove your software as described here before reinstalling it.
Note: To uninstall other software included with your scanner, see the online help
documents included with those programs.
Windows
1. Turn off the scanner and disconnect it from your computer.
2. Open the Windows Control Panel and select Uninstall a Program (Windows
Vista), Add or Remove Programs (Windows XP) or Add/Remove Programs
(Windows 2000).
3. Select EPSON Scan, and click Uninstall/Change (Windows Vista) or
Change/Remove (Windows XP or 2000).
With Windows Vista, when you see the User Account Control screen, click
Continue.
4. When a confirmation box appears, click Yes.
5. Follow the on-screen instructions to remove the software. If you see a message
prompting you to restart the computer, select Yes, I want to restart my
computer now
, and click Finish.
See the Start Here sheet to reinstall your software.
Macintosh
1. Turn off your scanner and disconnect it from your computer.
2. Insert your Scanner Software CD-ROM in your drive. If necessary, double-click
the CD-ROM icon.
3. Open the
COMMON\EPSON Scan folder.
4. Double-click the EPSON Scan Installer icon.
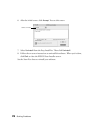
5. If the Authorization window opens, click the key icon, enter the Administrator’s
name and password, click
OK, then click Continue.


