


Many word processors and other software programs give you two ways
to change these settings:
l
You can change the settings in each individual file you print.
l
You can change the program’s default settings so that every time you
use
the
program, these new settings are in effect.
If your program has additional features, such as headers and footers, you
have to compensate accordingly.
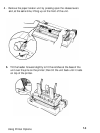
Control panel operation
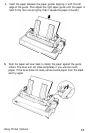
All of the functions from the control panel are available in cut sheet
feeder mode. You can use micro-adjustment to change the loading
position immediately after loading a sheet using the single sheet insertion
method described on page
7-14.
Micro-adjustment sets a
new sheet
loading position for as long as
the
power remains on. If
the
power is
turned off, the loading position returns to
the
factory setting. Changing
the loading position with micro-adjustment affects the number of lines
per page. You may need to change your software margin settings again
for this new page length. See the section on micro-adjustment in
Chapter 2.
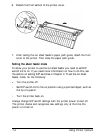
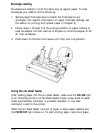
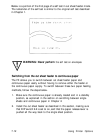
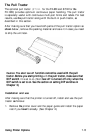
Testing the printer in the cut sheet feeder mode
The printer’s built-in self test in the cut sheet feeder mode is slightly
different from that of the original self test. To test the printer in cut
sheet
feeder mode, load the paper you will be using into the paper bin. Hold
down
the LINE FEED
or
FORM FEED
button and turn the power switch on
as described in Chapter
1.
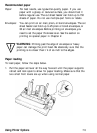
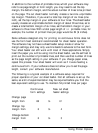
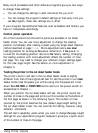
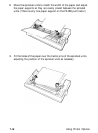
When you perform the cut sheet feeder self test, the printer counts the
number of lines on the page and prints out this number at the bottom of
the first page as shown in the following figure. The number of lines
counted by the printer becomes the new default page length setting for
the cut sheet feeder mode. You can override this setting, however, using
software commands.
The self test is especially useful when you want to change
the
page length
settings for your application program, because it gives you a quick count
of the number of lines on the page.
Using Printer Options
7-11