


Other control panel features
The control panel of the FX also gives you access to several special
functions.
Self test
By holding down the
FORM FEED
or
LINE FEED
button
while you turn on the printer, you can start the
printer’s self test. This prints out the DIP switch
settings and the characters in the printer’s ROM (Read
Only Memory). See
the
section on the self test in
Chapter 1 for more information.
Micro-
adjustment
By pressing the
FORM FEED
and
LINE FEED
buttons
immediately after loading paper or using short tear-
off, you can make fine adjustments to the loading and
short tear-off positions. See the section on micro-
adjustment in Chapter 2 for more information.
Data dump
By holding down both the
FORM FEED
and
LINE FEED
buttons while you turn
on
the printer, you can turn on
the
data dump mode. This feature allows advanced
users to diagnose many problems. See the section
on
the data dump mode in Chapter 6 for more
information.
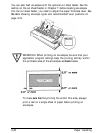
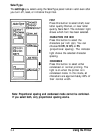
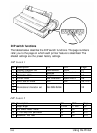
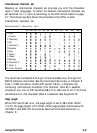
Setting the DIP Switches
By changing the settings of the two sets of DIP switches behind and
below the platen knob, you
can
control various printer features, such as
the character set and page length. These new settings become valid
whenever the printer is turned
on,
reset, or initialized.
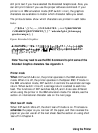
Before you set the DIP switches, turn off the printer. Then use a pointed
instrument, such as the tip of a pen or pencil, to move the switch to
either
the on
or off position. The new settings become valid when you
turn on the printer.
Using the Printer
3-5