


4-6
Using Filters and Frames
Note:
❏
The selected Frame No. is retained until the printer is turned off.
❏
If you press any buttons other than the
Change Settings
buttons while selecting the Frame No., the current number
becomes valid and the printer turns on the Frame mode.
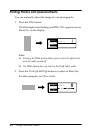
3. Press the
Frame
button again.
The Frame light turns on to indicate the Frame mode is on.
Note:
❏
Type, Size, and Layout are automatically changed to the Sticker
mode.
❏
If you press the
Cancel
button, the Frame mode is turned off
with the Frame No. being retained.
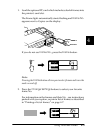
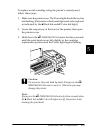
4. Eject the optional PC card you inserted in step 1 from the
printer’s card slot and load the PC card with the stored
photograph.
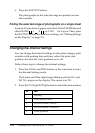
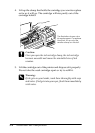
5. Load A6 size paper divided into 16 small stickers.
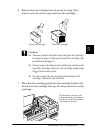
6. Select the photo No. you want to print with the selected
frames and print it.
Note:
If photos are not printed within the stickers, adjust the print start
position. For detailes, see “Changing the Internal Settings” on page
3-22.