


XTP T UWP 302 • Installation and Operation 4
Installing the Mud Ring or Junction Box
Cutting an Opening in the Mounting Surface
1. Using an appropriate template or the mounting enclosure as a guide, mark the area
of the wall with a soft pencil that will be cut (for the provided mud ring, see Mounting
Template on page 39).
NOTE: Check with the manufacturer of the junction box for specific installation
requirements.
2. Use a jigsaw or small hand saw to carefully cut away the material within the guidelines
drawn in step 1.
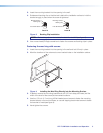
3. Check the size of the opening by laying the mud ring or junction box against it. The
mounting device should fit snugly in the opening.
4. If needed, use a saw, file, or sandpaper to enlarge the hole.
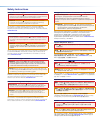
CAUTION: Risk of personal injury. Smooth the edges of the opening to avoid
personal injury during installation.
ATTENTION: Smooth the edges of the opening to avoid damage to the mounting
device or the cables.
Installing the Mud Ring
The provided mud ring can be installed in two different ways depending on the width and
type of mounting surface. Install the mud ring with backing clips for thin or less sturdy
surfaces like wallboard, particle board, or soft wood. Install the mud ring directing into the
wall with screws for sturdy or dense surfaces like sheet metal, plywood, or hard wood.
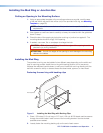
Fastening the mud ring with backing clips
Mounting Bra
cket
a
b
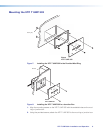
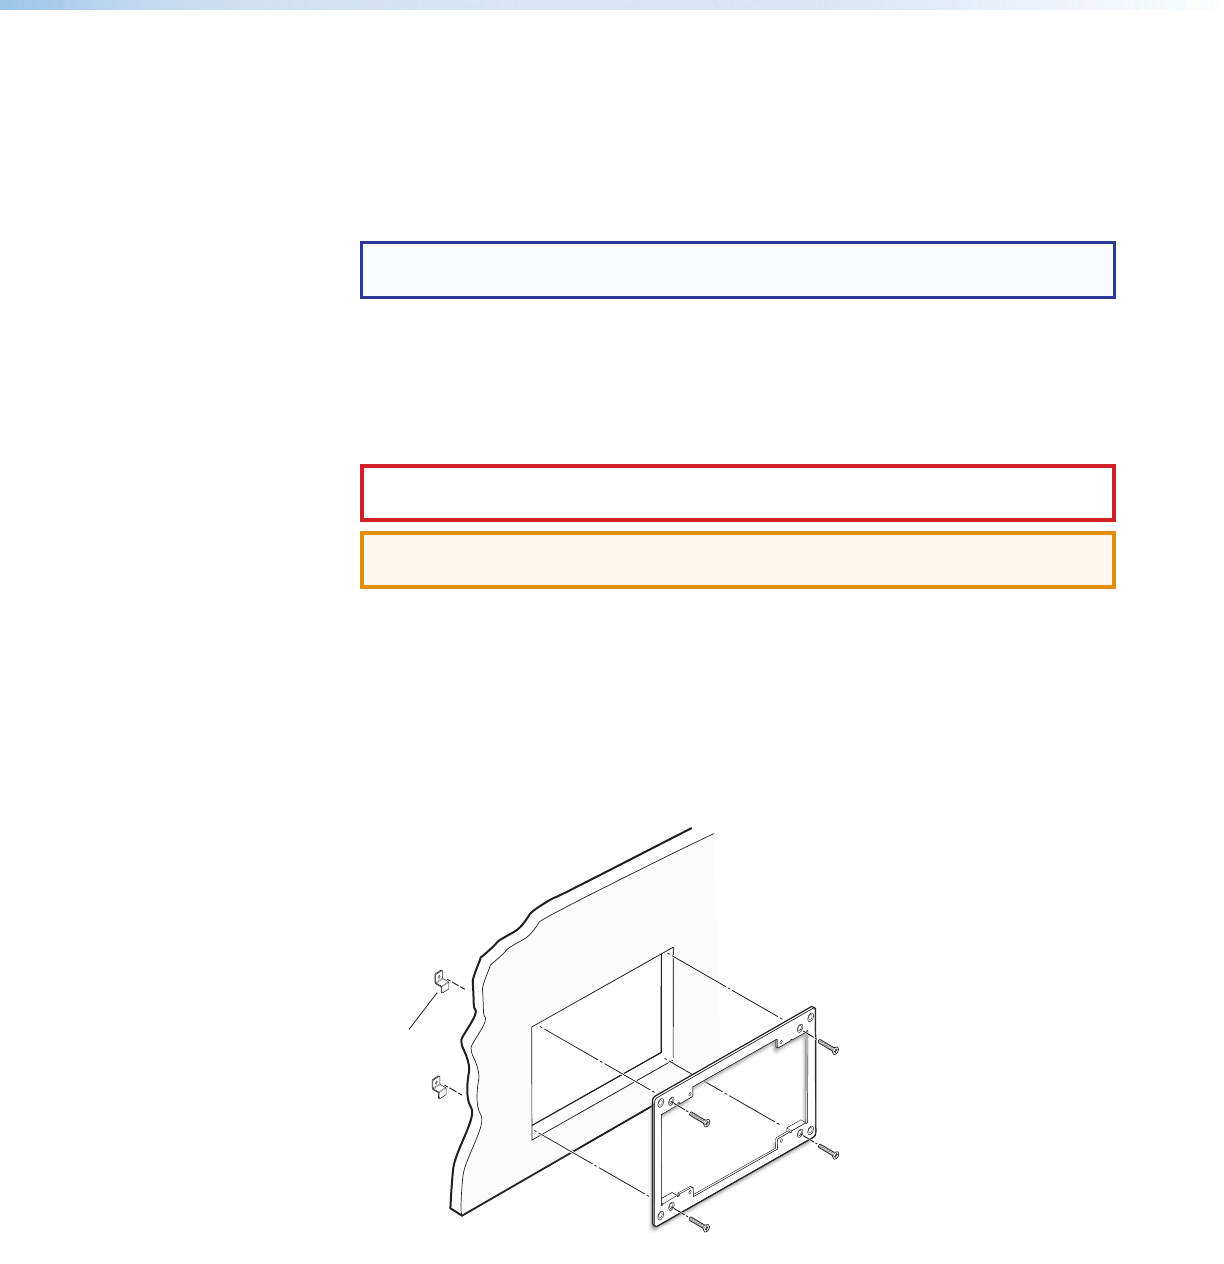
Figure 2. Installing the Mud Ring with Backing Clips
1. Place 1.25 inches (3.18 cm) long or 0.75 inch (1.90 cm) #6-32 thread machine screws
through the middle holes in each corner of the mounting bracket. Use the shortest
possible screw needed.
2. Loosely fasten the mounting backing clip on the end of each screw.