


TeamPoS 3000 XL and XL
2
Maintenance
7-14 Issue 3 D900000145
7.3 Replacing the CPU and Heat Sink
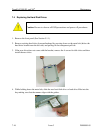
Caution: Be sure to observe all ESD precautions and power off procedures.
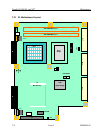
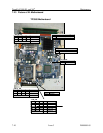
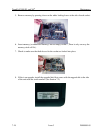
The heat sink and CPU are installed on the front of the motherboard (viewed from the front of
the unit) just to the right of the memory. Both parts come in the same kit.
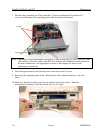
1. Remove the back panel (See section 5.1.2).
2. Disconnect the power cable from the controller.
3. Remove the front panel (See Section 5.1.1). The yellow LED should be off (See Section
1.2).
4. Remove the motherboard assembly (See Section 5.2).
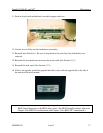
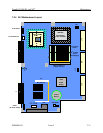
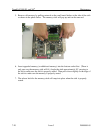
5. Remove the heat sink by loosening the 4 spring-loaded screws that attach it to the
motherboard. There is a mounting bracket on the bottom of the motherboard. Leave this
bracket in place. If the motherboard is moved, the mounting bracket may drop out of
place. Be sure to hold on to the bracket to keep it in place when reinstalling the heat-
sink..
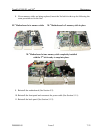
Heat Sink
4 spring mounted screws
Underside of
Motherboard
Heat Sink Bracket
(4 spring-loaded screws thread
through from the top)