


79
www.gateway.com
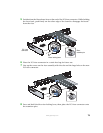
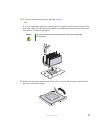
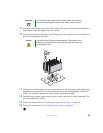
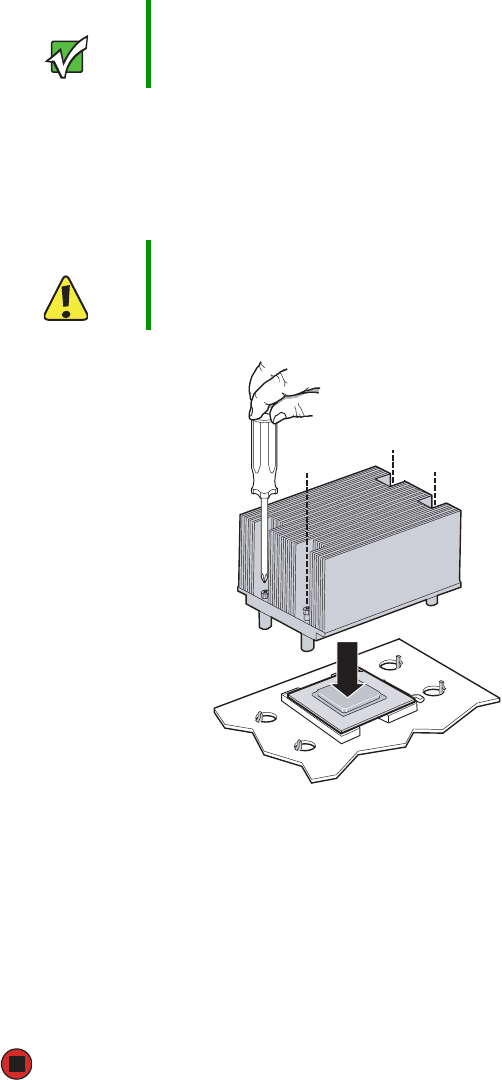
9 Install the new processor into the CPU socket, then press the processor locking lever
down until it lays flat against the CPU socket.
10 Place the heat sink over the processor, lining up the four captive screws with the four
posts surrounding the processor.
11 Loosely screw in the captive screws on the corners of the heat sink, gently tightening
diagonal screws (screw in one screw, then the screw located diagonally to the first
screw). Do not fully tighten one screw before tightening another.
12 Gradually and equally tighten each captive screw until each is firmly tightened. Do
not over-tighten the screws.
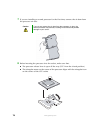
13 Follow the instructions in “Installing the processor air duct” on page 42.
14 Follow the instructions in “Closing the server case” on page 39.
Important If you install two processors onto the system board, the processors
must be the same speeds, revision, core voltage, and bus speed.
Caution The heat sink has Thermal Interface Material (TIM) located on the
bottom of it. Use caution when you unpack the heat sink so you do
not damage the TIM.