


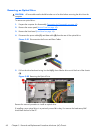
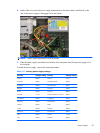

9.
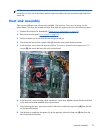
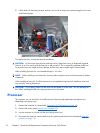
Lift the heat sink from the processor and set it on its side to keep from contaminating the work area
with thermal grease.
To install a heat sink, reverse the removal procedures.
CAUTION: For heat sinks secured with retaining screws, tighten the screws in diagonally opposite
pairs (as in an X) to evenly seat the heat sink to the processor. This is especially important as the pins
on the socket are very fragile and any damage to them may require replacing the system board.
When installing the heat sink, recommended torque = 4-6 in-lbs.
NOTE: When installing a new heat sink, remove protective plastic cover from thermal pad on bottom
of heat-sink.
When installing a heat sink, if sufficient pressure is not applied during heat sink installation, heat sink
may cant (tilt), causing boot errors.
CAUTION: Do not apply pressure to the heat sink fan blades or center area. This may damage the
fan. When installing the heat sink, apply pressure only to fan frame.
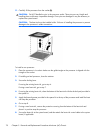
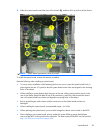
Processor
The computer may use an Intel or an AMD processor. Removal and replacement procedures vary
depending on processor type.
1.
Prepare the computer for disassembly (
Preparation for Disassembly on page 42).
2.
Remove the access panel (
Access Panel on page 43).
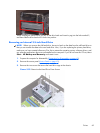
3.
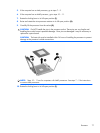
Lay the computer on its side with the rear facing toward you.
4.
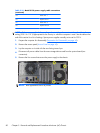
Disconnect the heat sink control cable from the system board and remove the heatsink
Heat sink
assembly on page 75).
76 Chapter 5 Removal and Replacement Procedures Minitower (MT) Chassis