Index
Maintenance and Service Guide Index–6
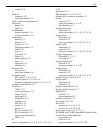
Automatic DriveLock 5–4, 5–11, 5–17
change password 5–4, 5–10, 5–16
Disk Sanitizer 5–4, 5–11, 5–17
DriveLock 5–4, 5–10, 5–16
fingerprint reader ownership reset 5–4, 5–10,
5–16
HP SpareKey 5–4, 5–10, 5–16
HP SpareKey enrollment 5–4, 5–10, 5–16
password policy 5–4, 5–10, 5–16
set up BIOS administrator password 5–3, 5–10,
5–16
System IDs 5–4, 5–11, 5–17
TPM embedded security 5–4, 5–11, 5–17
user management 5–3, 5–10, 5–16
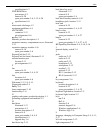
security, product description 1–5
serial number 3–1
service considerations 4–1
service tag
location 4–5
part number 4–5
serial number 4–5
serviceability, product description 1–7
SIM slot 2–13
SIM, removal 4–8
smartcard reader 2–12
solid state drive
illustrated 3–12
spare part number 3–6
specifications 6–4
spare part numbers, sequential listing 3–14
speakers 2–10
removal 4–45
spare part number 3–5, 4–45
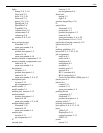
specifications
Blu-ray R/RE DVD±RW SuperMulti Drive
6–5
Blu-ray ROM with LightScribe DVD±RW Su-
perMulti DL Drive 6–6
computer 6–1
display 6–2
DVD±RW and CD-RW SuperMulti Dou-
ble-Layer Combo Drive with Light-
Scribe 6–7
DVD-ROM Drive 6–8
hard drive 6–3
IRQ, DMA, I/O, and memory addresses 6–9
optical drive 6–6, 6–7, 6–8
solid state drive 6–4
system resources 6–9
switch cover
removal 4–22
spare part number 3–3, 4–22
switch, internal display 2–4
system board
removal 4–50
spare part number 3–5, 4–50
System Configuration menu 5–5, 5–11, 5–17
system IDs 5–4, 5–11, 5–17
system recovery 7–1
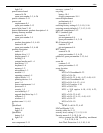
T
tag, service 4–5
thermal heatshield, spare part number 3–13
thermal material 3–5
tools required 4–1
top cover
removal 4–42
spare part number 3–5, 4–42
TouchPad 2–7
button 2–5
light 2–8
TouchPad buttons 2–7
TouchPad scroll zone 2–7
TPM embedded security 5–4, 5–11, 5–17
U
Universal Serial Bus (USB) port
location 2–12
pin assignments 8–5
upgrade bay, hard drive option 3–6
upgrade drive bay 2–12
V
vents 2–12, 2–13
volume down button 2–5
volume down light 2–9
volume mute button 2–5
volume mute light 2–9
volume up button 2–5
volume up light 2–9
W
warranty period 4–5
webcam light, location 2–2
webcam module
removal 4–34
spare part number 4–34
webcam, location 2–2
Windows applications key 2–6
Windows logo key 2–6
wireless
antenna


