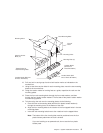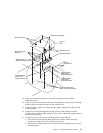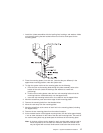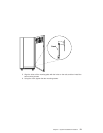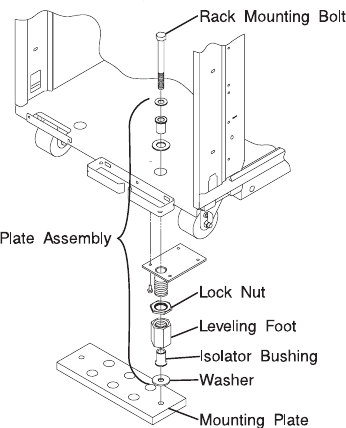
1. Install the 4 plate assemblies with the levelling feet, bushings, and washers. Make
sure that the leveling feet are backed off the floor level to allow space for the
mounting plates.
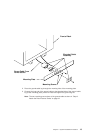
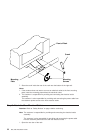
2. Place the mounting plates, front and rear, (note that they are different) in the
approximate mounting position under the system rack.
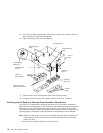
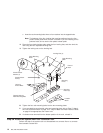
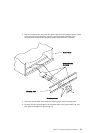
3. To align the system rack over the mounting plate, do the following:
a. Place the four rack-mounting bolts through the plate assembly holes at the
bottom of the rack (install the bushings and washers to ensure bolt
positioning).
b. Position the mounting plates under the four rack-mounting bolts so that the
mounting bolts are centered directly over the tapped holes.
c. Insert the rack-mounting bolts three or four rotations into the tapped holes.
4. Mark the raised-floor panel around the edge of both mounting plates.
5. Remove the mounting bolts from the threaded holes.
6. Move the rack away from the mounting plates.
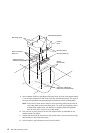
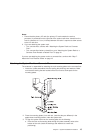
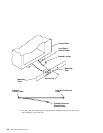
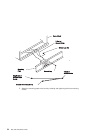
7. Mark the raised floor at the center of each hole in the mounting plates (including
the tapped holes).
8. Remove the two mounting plates from the marked locations.
9. At the marked location of the tapped mounting holes, drill two holes approximately
1 inch to allow clearance for the ends of the two rack-mounting bolts. Tthe ends of
the rack-mounting bolts may protrude past the thickness of the mounting plate.
Note: A minimum of three anchor plates for each mounting plate must be used to
mount the plates to the concrete floor. Because some of the drilled holes
may be aligned with concrete reinforcement rods below the surface of the
Chapter 1. System Installation Procedure 17


