


IDP 75, 250, 800, and 8200 Installation Guide
22 Connecting to the Sensor
Simple Configuration Values
A simple configuration has the following settings and values:
Root password—abc123
Fully qualified domain name—Blank
High availability mode—Disabled
RADIUS support—Disabled
Network interfaces—Auto
Virtual routers—
Sniffer mode: One virtual router created (vr0)
Transparent mode: One virtual router created for each pair of interfaces
DNS—Disabled
NTP—Disabled
SSH on management port—Enabled
Run ACM process on sensor startup—Enabled
Advanced Configuration
If you wish to use a sensor mode other than inline transparent or passive sniffer, or
if you do not want to use the default options for the other settings, you will have to
use the Appliance Configuration Manager. See “ACM Advanced Configuration” on
page 26.
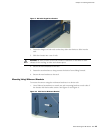
Connecting to the Sensor
Your sensor has two management interfaces: a console serial port and a
management Ethernet port. You can use either one to set the sensor IP address and
other basic configuration parameters.
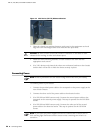
The console serial port is used only for configuring and troubleshooting. After the
sensor is configured, you can disconnect the console port. The management port,
however, must be able to reach the NSM device server over the network. For this
reason, you must give the sensor an IP address that the NSM device server can
reach.
Using the Console Serial Port to Configure the Sensor
Use this procedure if you want to set up your sensor in simple configuration, or if
you just want to set an IP address so the sensor is reachable over the network. After
the sensor’s management interface settings are in place, you can reconfigure the
sensor over the network.