


Reimaging the IDP Sensor 37
Chapter 6: Updating Software on the Sensor
7. Reboot the device when the script is finished.
8. Type
reboot
and press Enter.
9. Reconnect the HA cable after upgrading all of the sensors in the cluster.
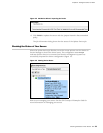
10. In NSM, right-click the sensor in Device Manager, and then select Adjust OS
Version.
Reimaging the IDP Sensor
Each IDP sensor comes with software preinstalled. However, if you need to reload
the software onto your sensor, you can use the USB stick that was shipped with the
sensor. This process is known as imaging.
To reimage the IDP sensor:
1. Connect a PC to the console serial port of the device, using the serial cable
provided with the IDP sensor.
2. Power off the IDP sensor.
3. Insert the “Restore Media” USB stick into the USB flash drive on the front of the
sensor.
4. Power on the IDP sensor.
The sensor boots from the USB stick and runs the reimaging process. Follow
any prompts on the serial console. When instructed to do so at the end of the
imaging process, reboot or power-cycle the IDP sensor.
5. When the process is complete, configure the IDP sensor according to the
instructions in Chapter 5, “Configuring the IDP Sensor,” on page 21.
NOTE: You will need to reinstall the license when reimaging the IDP sensor.
Contact JTAC for information on how to obtain your license information. Go to
Requesting Technical Support on page xii for information on how to contact JTAC.