Removing a J2320 or J2350 Crypto Accelerator Module
NOTE: If you are installing a Crypto Accelerator Module into a J2320 or J2350 Services
Router for the first time, proceed directly to “Installing a J2320 or J2350 Crypto
Accelerator Module” on page 148.
To remove the Crypto Accelerator Module:
1. Place an electrostatic bag or antistatic mat on a flat stable surface to receive the
Crypto Module.
2. Attach an electrostatic discharge (ESD) grounding strap to your bare wrist and
connect the strap to the ESD point on the chassis, or to an outside ESD point if
the router is disconnected from earth ground. For more information about ESD,
see “Preventing Electrostatic Discharge Damage” on page 201.
3. Press and release the power button to power off the Services Router. Wait for
the POWER LED to turn off.
4. Unplug the power cord or cable from the power source receptacle.
5. Remove the chassis cover. (See “Removing and Replacing the Chassis Cover on
J2320 and J2350 Routers” on page 124.)
6. Locate the Crypto Module on the system board (see Figure 81 on page 146).
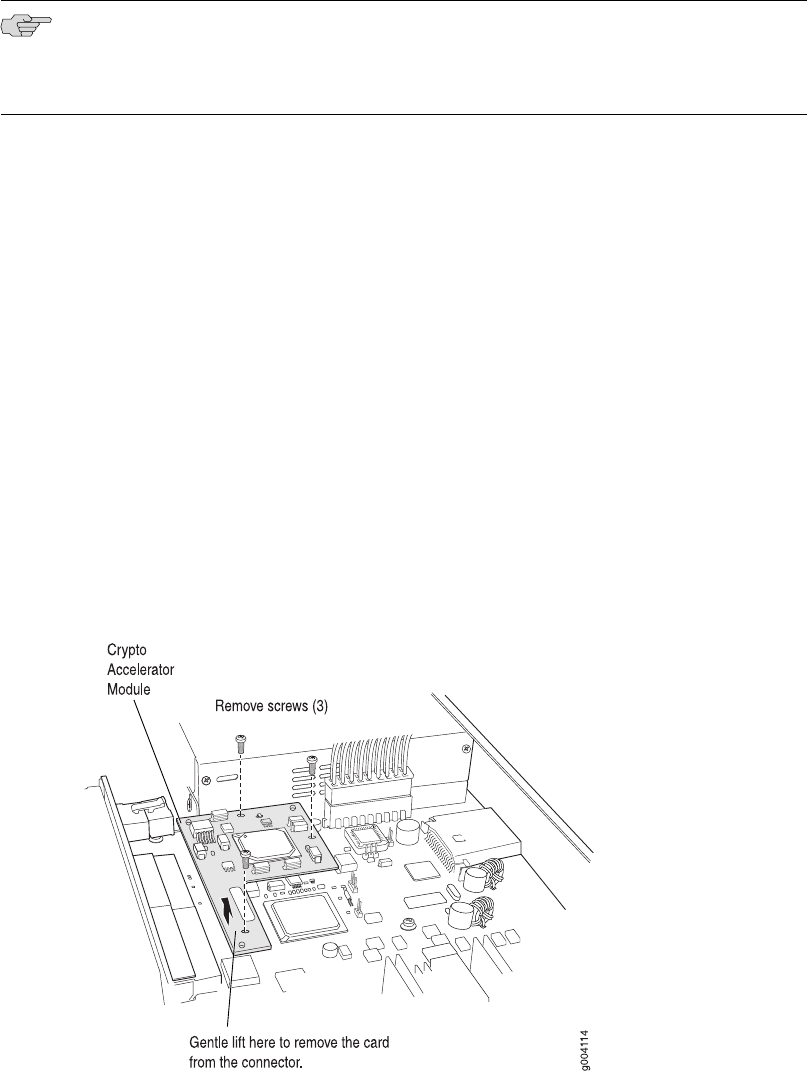
7. Using a Phillips screwdriver, remove the three screws from top of the Crypto
Accerator Module, as shown in Figure 82 on page 147.
Figure 82: Removing a J2320 or J2350 Crypto Module
8. Gently lift the Crypto Module to disengage it from the connector on the system
board, as shown in Figure 82 on page 147.
9. Place the Crypto Module on the antistatic mat or in the electrostatic bag.
Replacing Crypto Accelerator Modules on J2320 and J2350 Routers ■ 147
Chapter 8: Replacing Hardware Components
