


page 4.18
4. Using the menus Digital Projection LIGHTNING 35HD User Manual
Notes
The eight buttons of the Main
menu are always visible at the
bottom of the display.
To go back to a previous menu
option that is no longer visible,
call up the menu again using
the appropriate Main menu
button.
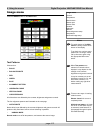
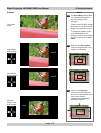
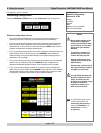
The Input adjust controls allow
you to select which portion of
the video image is to be
displayed.
These controls DO NOT change
the position or size of the whole
image on the projection screen.
To change the position or size
of the whole image on the
projection screen, use the Move
and Zoom controls in the Lens
menu.
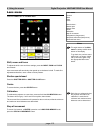
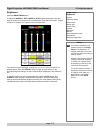
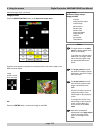
Advanced image setup
Press the ADVANCED IMAGE SETUP button on the Image menu:
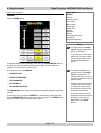
Input window
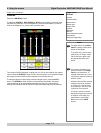
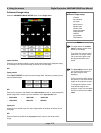
Press the arrow heads to select a portion of the video image to be displayed, hiding
or revealing more or less of the image, as shown on the next page.
OR
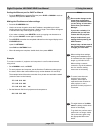
Input preset
Press INPUT PRESET to see all six preset image sizes. Choose by pressing on the
required Preset button.
OR
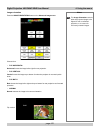
Press on the number in the middle of the Input window arrows, to cycle through the
preset image sizes. Choose (up to the maximum set in Input preset) from:
• 2048x1080 • 1920x1080 • 1400x1050
• 1280x1024 • 1280x720 • 640x480
Input pan
Press the arrow heads to pan the video image within the window, as shown on the
next page.
OR
Press on 0,0 in the middle of the Input pan arrows, to pan to the centre of the
image.
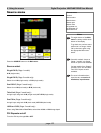
Image menu...
Advanced image setup
Controls
Input window
Input pan
Menu buttons...
Shutter open
Shutter close
Image orientation
Image position
Gamma
Input preset
Test Patterns