


page 4.24
4. Using the menus Digital Projection LIGHTNING 35HD User Manual
Notes
Do not make changes to the
networking configuration
unless you understand what
you are doing, or have taken
advice from your Network
Manager.
If you make a mistake, it is
possible that you will lose
contact with the projector.
Always double-check your
settings before pressing the
APPLY button.
Always keep a written note of
the original settings, and any
changes you have made.
If using DHCP, then keep the
projector switched on at all
times, and make sure the
projector is accessible, as the
IP address could be re-
assigned on power-up or
after a lost connection.
For information about how to
connect the projector, see
Connecting the projector in
section 2. Installation, and
Connections in section
6. Appendix.
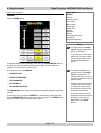
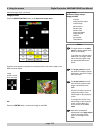
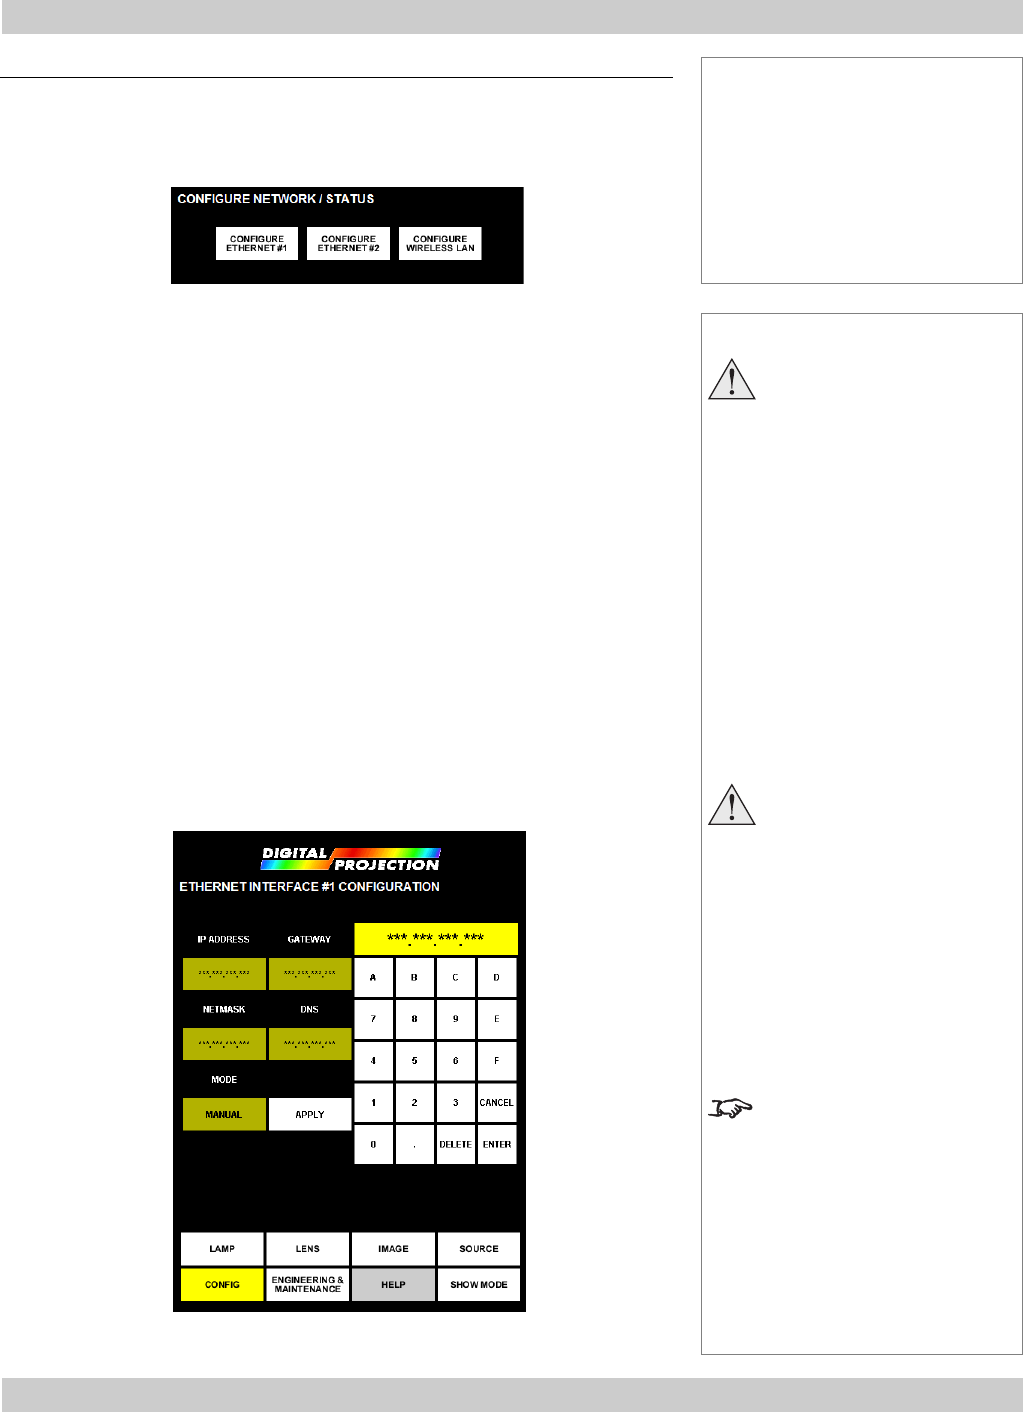
Networking configuration
Press the NETWORK CONFIG button on the Config menu, then choose from:
Ethernet configuration choices
• You can use either the Ethernet #1 or #2 port to connect the projector to a
controlling computer, but the two ports should always be set differently.
• If you are connecting the projector to an existing computer network that has a
DHCP (Dynamic Host Configuration Protocol) domain controller located in a
network server or router, then you should set the port to DHCP mode, and the
projector will determine its settings automatically.
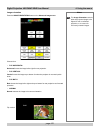
• If you are connecting the projector to an existing computer network that does not
support DHCP, then you should set the port to MANUAL mode, obtain the
network settings from your Network Manager, and configure the projector as
described on the next page.
• If you are connecting a number of projectors and computers in a self contained
network, then you should set the port to MANUAL mode, configure the IP
address and Netmask settings as shown in the example on the next page.
• If you are connecting a single projector to a computer using a crossed LAN
cable, then you should set the port to MANUAL mode and leave the IP address
and Netmask settings at their default values. Configure the computer to match
the projector, but with the last number of the IP address different.
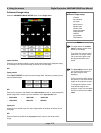
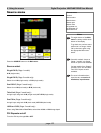
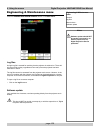
Configuration menu, continued
Config menu...
Network configuration...
Ethernet #1 or #2
Settings...
IP address
Netmask
Mode
Gateway (not yet available)
DNS (not yet available)