


33
32
Basic scanning
Making the final scan
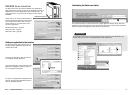
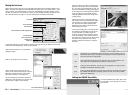
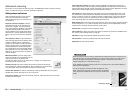
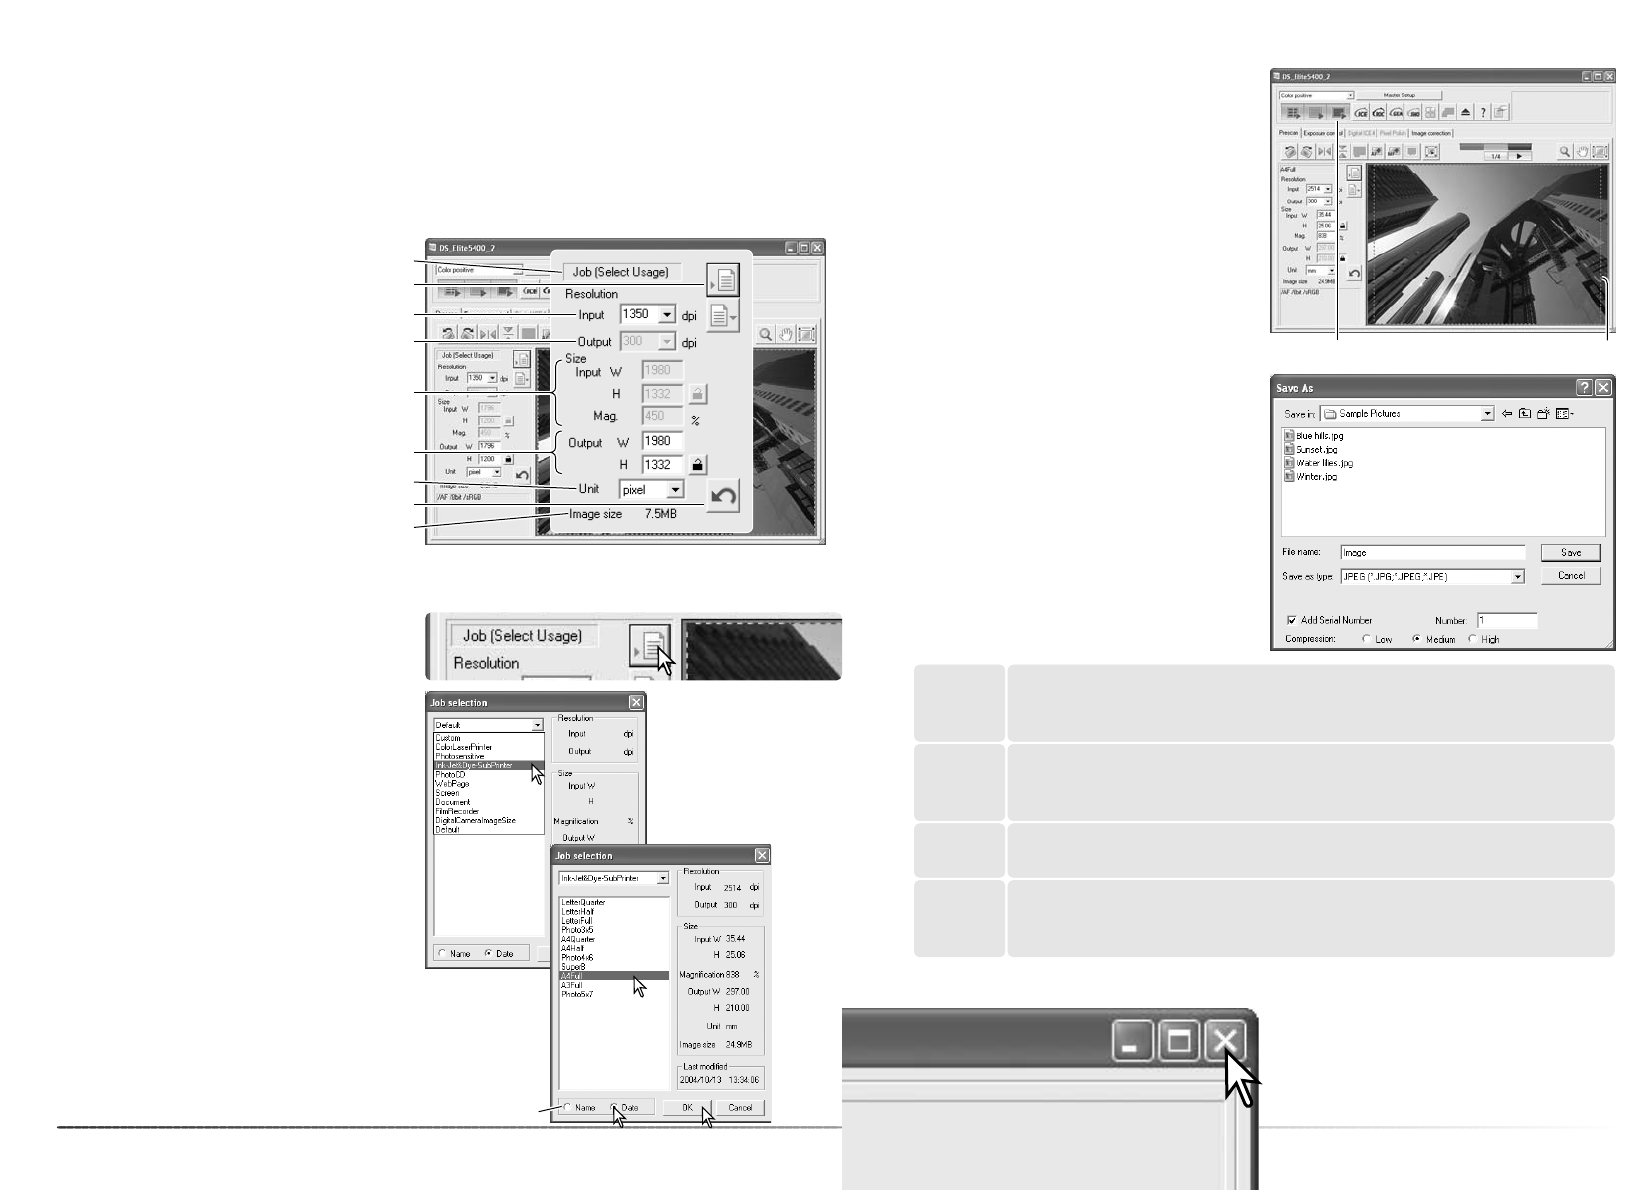
Click the load Job button. The Job-selection
dialog box opens.
Select a Job category from the list box.
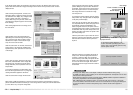
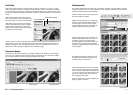
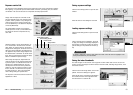
Before making the final scan, the input and output parameters must be specified. While it’s pos-
sible to input the scan settings yourself, DiMAGE Scan Utility gives you an easier choice - Jobs.
Jobs are preset scan settings based on image use. The DiMAGE Scan Utility contains over 60
Job files. To create your own Job files or to input the scan settings manually, see page 46. For a
list of Job parameters, see page 74. The scan-setting pane is located in prescan tab.
Reset button
Load Job button
File dimensions
Scan dimensions and magnification
Scan resolution
Job name
Unit of dimensions
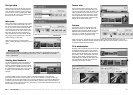
Image size is based on the total number of pixels in the image and can be different from the size
of the saved data depending on the file format selected.
A file type used in Macintosh. This file can be opened in the Simple Text applica-
tion installed with Macintosh operating systems. The file cannot have a width
greater than 4096 pixels.
PICT
A file type used in Windows. This file type can be opened in the paint software
installed in the Windows operating system.
BMP
A high-resolution bitmap that can be opened on any computer platform. The
color depth can be specified in the preference window (p. 40).
TIFF
This file can be compressed to reduce the file size. The compression ratio can
be selected when saving. The higher the compression ratio, the smaller the file
size, and more loss to image quality.
JPEG
File resolution
Image size
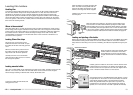
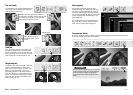
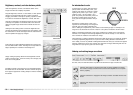
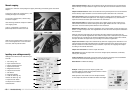
When the Job file is loaded, a cropping frame
appears on the image. The frame is proportion-
al to the output use specified with the Job. The
frame can be resized by clicking and dragging
on the marquee, but the proportions remain the
same; the input and output values are auto-
matically adjusted to match the change to the
cropping frame.
Click the scan button in the main window to
start the final scan. If the DiMAGE Scan Utility
was opened in an image-processing applica-
tion, the scanned image is opened in that
application. If the utility is used by itself, the
save as dialog box opens.
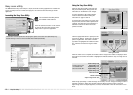
On the save-as dialog box, enter the file name,
and select the file destination and file format
for the image data. If multiple images are
scanned, a serial number is added to the file
name automatically; enter the first number of
the series in the number text box. When saving
JPEG files, the compression ratio must be
specified. Click the save button to make the
final scan.
Click a Job file name to select it. The Job
names can be sorted chronologically or alpha-
betically by clicking the name or date radio
buttons at the bottom of the dialog box.
The scan settings of the selected Job file are
displayed on the right side of the window. Click
the OK button to apply the Job settings.
Scan button Cropping frame
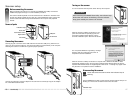
Quitting the DiMAGE Scan Utility
To close the DiMAGE Scan Utility, simply click
the close button in the top right corner of the
main window.
Sort radio buttons