


66
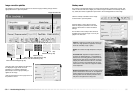
Batch scan utility
Batch scan utility
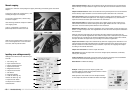
The Batch Scan Utility is for scanning a large
volume of images. This utility automatically
scans, processes, and saves all the images in
a film holder. The Batch Scan Utility is opened
with the DiMAGE Scan launcher, see page 20.
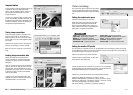
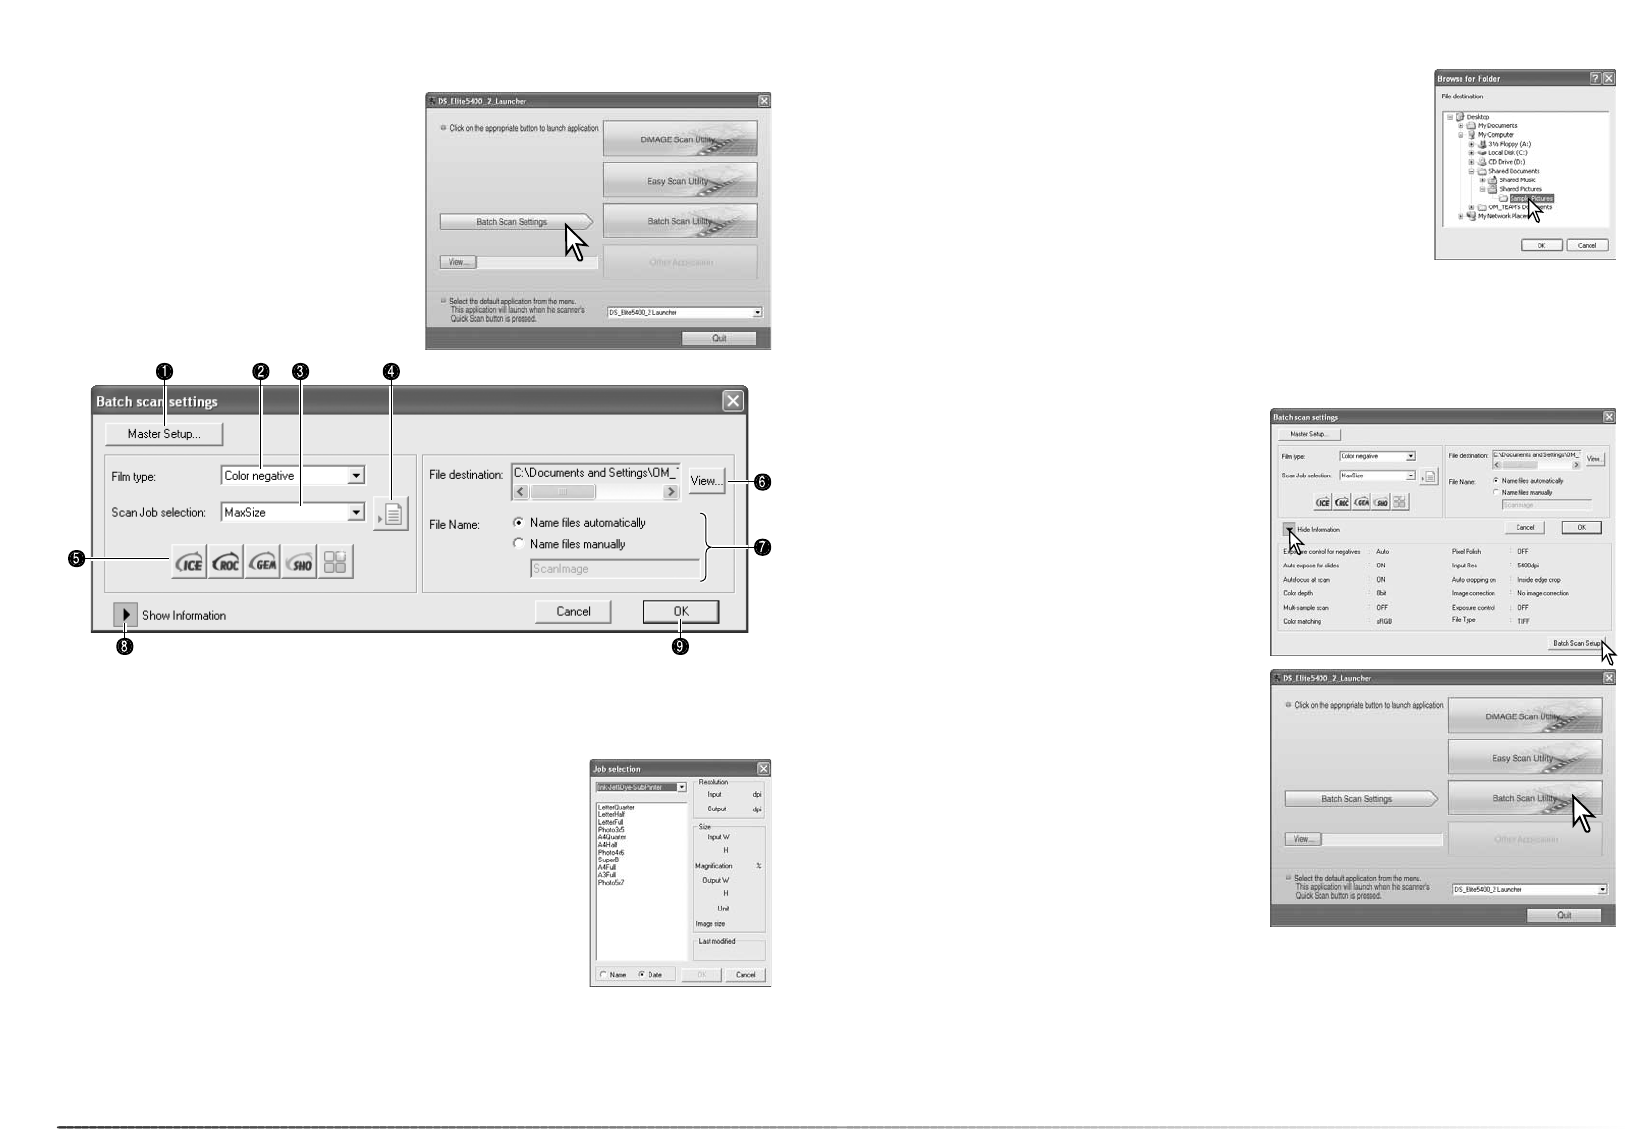
To set up the batch scan, click the Batch Scan
Settings button in the launcher window.
Confirm the scanner front door is closed and
there is holder inserted as the scanner will ini-
tialize.
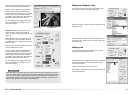
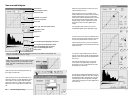
2. Select the film type with the list box (p. 28). When making Batch Scans, different film types
cannot be mixed.
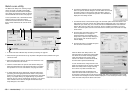
4. Click the Job load button to open the Job selection dialog box.
Select the appropriate Job and click the OK button to complete
the operation. For more on Job selection, see page 32 and 64.
5. To select Digital ICE, ROC, GEM, SHO, and Pixel Polish image
processing, click the appropriate buttons. Refer to the previous
sections in the manual for information on Digital ICE (p. 35), Digital
ROC (p. 51), Digital GEM (p. 52), Digital SHO (p. 53), and Pixel
Polish (p. 36). For memory requirements, see page 11. The param-
eters of these functions can be changed with the Batch Scan
setup dialog box, see 8 below.
67
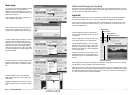
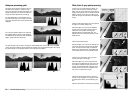
7. To select file names of the scanned images. The automatic option names files based on the
date and time of the scan; the file name begins with DS followed by sets of two registers to
indicate the year, month, day, hour, minute, and second. DS050523134510 was scanned in
2005 on May 23rd at 1:45pm and 10 seconds. The hour registers are based on a 24-hour
clock. The manual option uses the name entered in the text box plus an automatic four digit
serial number.
6. To select the destination of the scanned images. Click the view
button to open the browse dialog box. Use the folder tree to locate
the folder in which to save the files. Click the folder to select it.
Click the OK button to complete the operation. The destination is
displayed in the setting window.
1. To create and select a Master setup for Batch processing, see page 50.
3. Select the appropriate usage for the scan from the list box. Job
files can also be used, see 4 below.
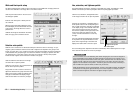
9. Click the OK button to complete the opera-
tion and return to the launcher.
8. Click the show information button to view
the scan parameters. To change the
advanced settings, click the Batch Scan
setup button to open the setup dialog box,
see next page. Click the button again to
hide the display.
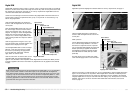
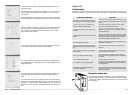
When the Batch Scan Utility button in the
launcher window is clicked, the scanner initial-
izes. When the set-holder message appears,
insert the holder into the scanner; all the
frames in the holder are scanned and saved,
and the holder is ejected automatically.
To scan another batch, change the film in the
holder and reinsert it into the scanner. Click the
Batch Scan Utility button to begin scanning.
The scanner only needs to initialize once.
If the Batch Scan Utility is allocated to the
Quick Scan button with the drop-down menu
at the bottom of the launcher, the first time the Quick Scan button is pressed the scanner initial-
izes and then the message to insert the holder is displayed. To scan subsequent holders, simply
insert the holder and press the Quick Scan button.