


68
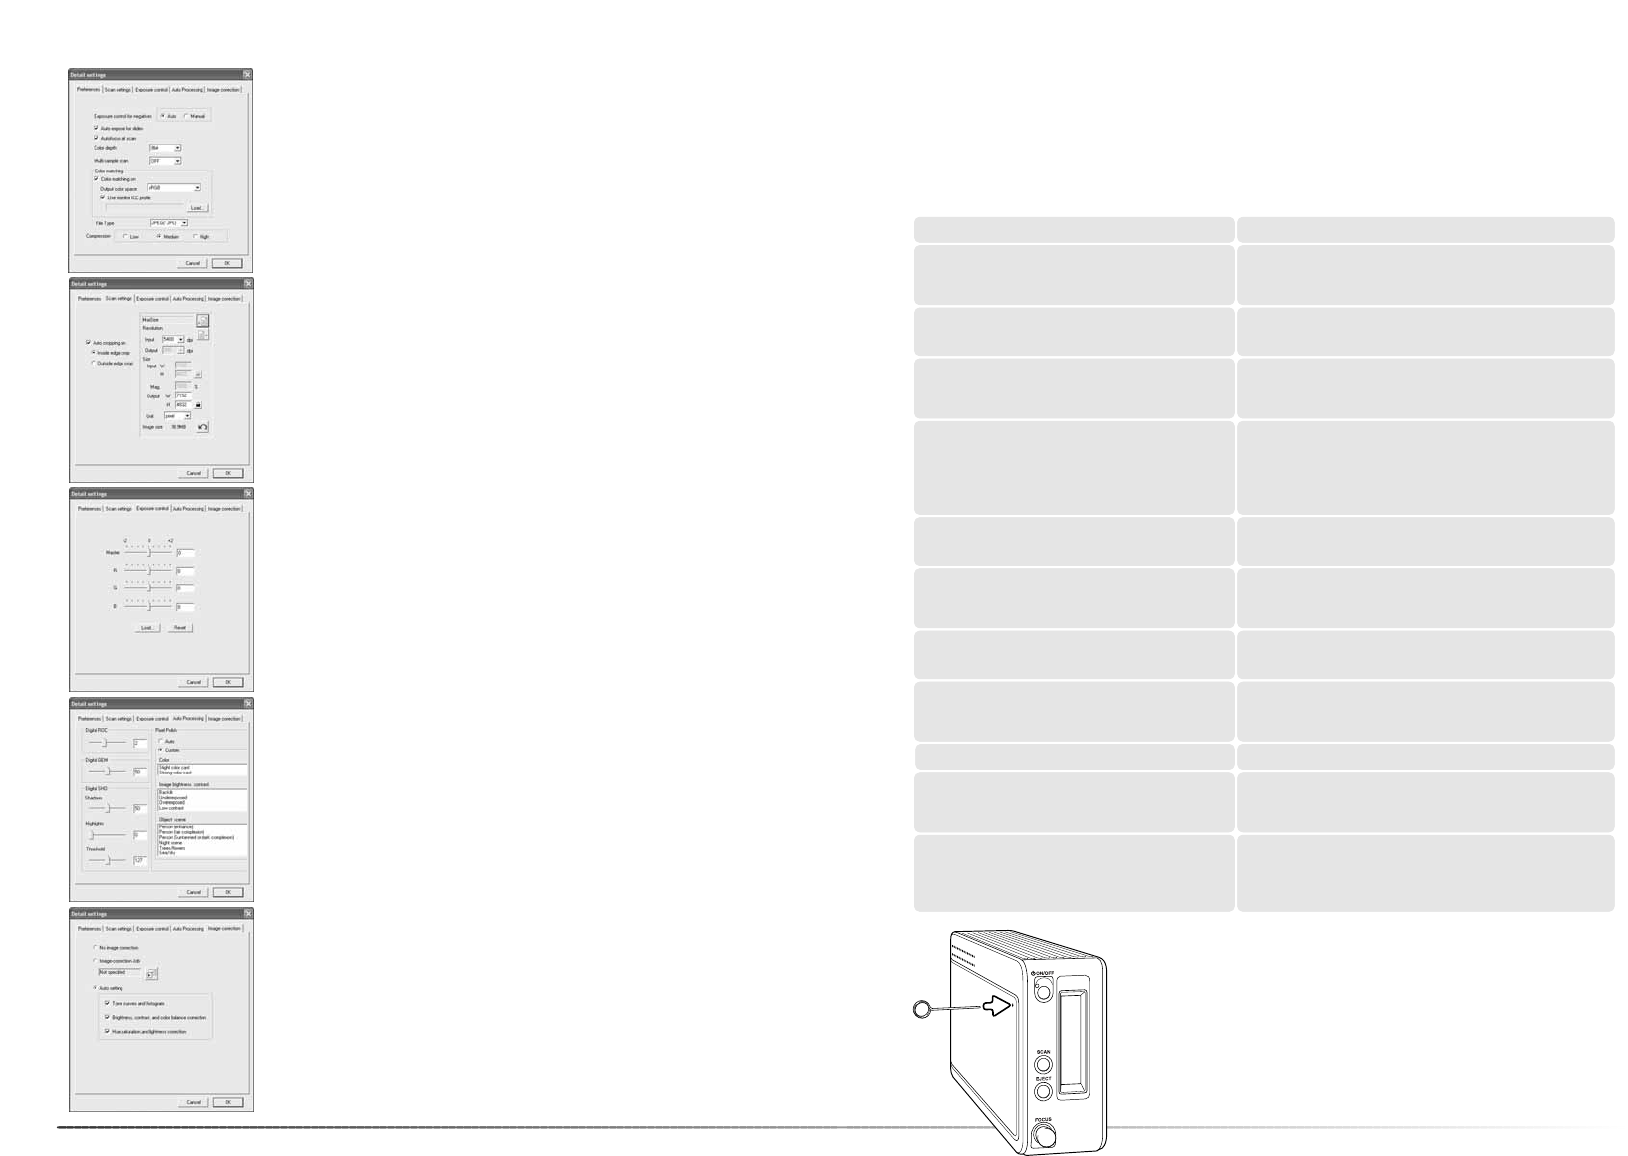
Batch scan utility
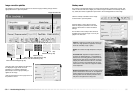
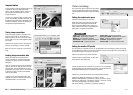
The Batch Scan setup button opens the setup dialog box, see 8 on
the previous page.
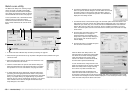
The preferences tab changes scanner preferences. For more on pref-
erences options, see page 40. For information on color matching,
see page 65.
When saving Batch Scan images in the PICT format, if the file width
exceed 4096 pixels, the file is saved in the TIFF format automatically.
The scan-setup tab specifies if images are cropped automatically as
well as output size and resolution. See page 31 for information on
auto cropping. See pages 32 and 46 through 49 on how to make,
save, and load scan settings.
69
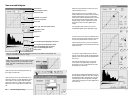
The auto-processing tab specifies the parameters for Digital ROC (p.
51), Digital GEM (p. 52), Digital SHO (p. 52), and Pixel Polish (p. 36)
image processing.
The image-correction tab specifies image processing applied to the
scanned images. See page 64 on how to load image-correction
Jobs.
The auto-setting functions automatically correct the scanned image:
the tone curve and histogram option improves color and contrast: the
brightness, contrast, and color-balance option improves contrast and
brightness: the hue, saturation, and lightness option improves satura-
tion.
The exposure-control tab controls the scanner exposure. See page
42 on how to make, save, and load exposure settings.
Appendix
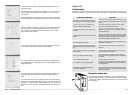
Troubleshooting
This section covers minor problems with scanner operation. For major problems or damage, or if
a problem continues to reoccur frequently, contact your dealer or a Konica Minolta service facility.
Increase the memory requirements for the host application.
If multiple images have been scanned, close and relaunch
the host application.
The insufficient-memory message appears.
Reload the holder into the scanner.The set-holder message appears.
The scanner door was opened during setup. Close the
door, and shut down and restart the scanner and DiMAGE
Scan Utility.
The scanner indicator lamp blinks rapidly.
The film holder was hindered during the scan. Turn off the
scanner, and restart the computer.
Cannot-verify-home-position message appears
during scanning.
Select an autofocus option in the preference dialog box, or
use point AF or manual focus.
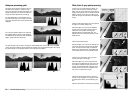
The scanned image is not sharp.
Confirm color negative film is selected in the main window,
and rescan the image, or color balance the image using the
DiMAGE Scan’s image-processing tools. If the problem is
not solved, reinstall the DiMAGE Scan Utility.
Unusual image color when scanning color nega-
tive film.
Turn off the scanner. Shut down the image-processing
application and increase its memory allocation. Restart the
computer and scanner.
The utility software freezes or the scanning time
increases.
Confirm the cable is securely connected between the com-
puter and scanner. Turn the scanner off and on. Click OK to
continue.
When starting up the utility software, could-not-
confirm-scanner-connection message appears.
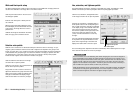
SOLUTIONSYMPTOM or MESSAGE
Remove the film holder and close the scanner door. Press
shift+control+I (Windows) or command+shift+I (Macintosh)
to initialize the scanner.
The DiMAGE Scan preview image displays
unusual color reproduction.
Quit all other DiMAGE Scan applications. If the problem
reoccurs turn off and restart the computer.
“Unknown error. Confirm other DiMAGE Scan
software is closed” message appears.
Turn the manual focus dial function on in the preference
dialog box.
Images not sharp when using the manual focus
dial. Slider displayed in the manual focus dialog
box.
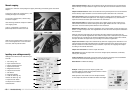
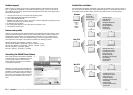
Closing the scanner door
If the door does not close automatically, it can be closed manually
with the supplied reset tool. Insert the tool into the hole on the side
of the scanner until the latch releases the door. Do not force the tool
into the scanner.