Section 3 PREPARATIONS
3-4
● Setting envelopes
Up to 20 envelopes can be set on the multi-bypass tray at a time.
Refer to the following table for the types and sizes of envelopes that
can be used in this machine.
1
Open the multi-bypass tray.
2
Align the insert guides with the envelope size.
Size
3 1/8" x 7 1/2"
3 3/8" x 9 1/2"
110 x 220 (mm)
162 x 229 (mm)
7 1/4" x 10 1/2"
3 7/8" x 8 7/8"
3 5/8" x 6 1/2"
176 x 250 (mm)
229 x 324 (mm)
200 x 148 (mm)
162 x 114 (mm)
234 x 105 (mm)
Acceptable envelope types
Monarch
Comm. #10
Envelope DL
Envelope C5
Executive
Comm. #9
Comm. #6-3/4
ISO B5
Envelope C4
Oufuku Hagaki
YOUKEI 2
YOUKEI 4
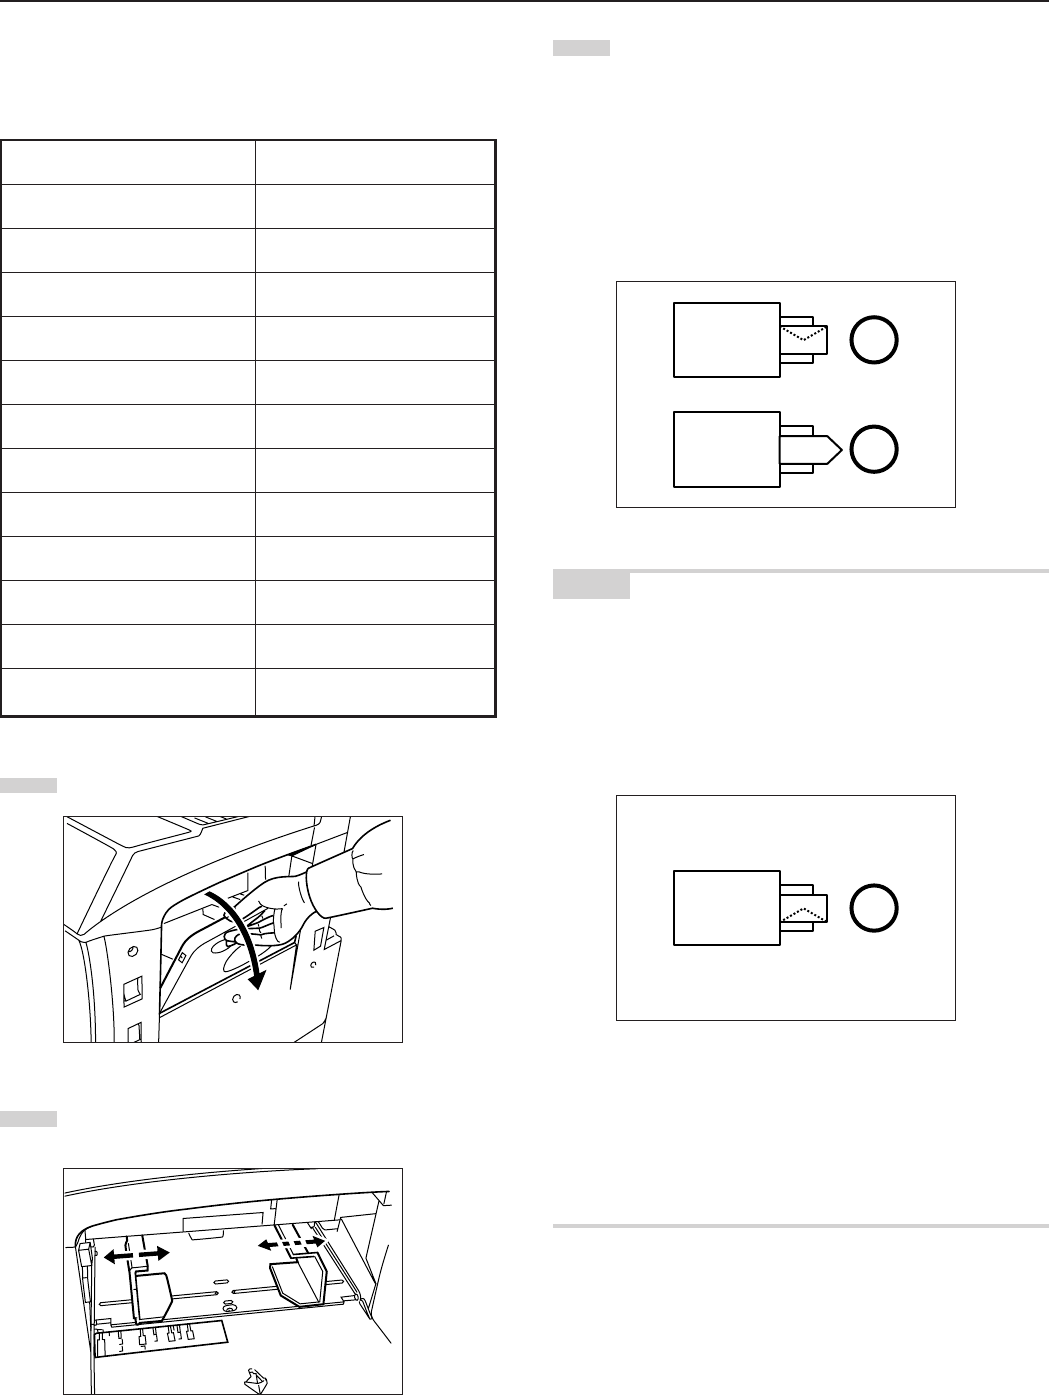
3
When using envelopes that are wider than they are tall, leave
the flap closed and set the envelopes with the copy side
facing upward and the flap facing towards the rear of the
copier. Then slide the envelopes into the slot along the insert
guides as far as they will go.
When using envelopes that are taller than they are wide,
open the flap and set the envelopes with the copy side facing
upward and the flap facing away from the direction of
insertion. Then slide the envelopes into the slot along the
insert guides as far as they will go.
NOTES
• If the optional Printer Kit or Printer/scanner Kit is installed on your
copier and you attempt to print from a computer onto envelopes that
are wider than they are tall, be sure to leave the flap closed and set
the envelopes with the side to be printed onto facing upward. Orient
the edge with the flap towards the front of the copier and then slide
the envelopes into the slot along the insert guides as far as they will
go.
• The proper orientation will actually depend upon the type of
envelope being used.
• Incorrectly loading envelopes can result in printing in the wrong
orientation or on the wrong side.
• When setting envelopes on the multi-bypass tray, BE SURE to
specify the type of envelopes that will be used under “3. Multi-
bypass tray paper settings” on page 7-87.
Copier
Copier
Copier
