


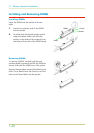


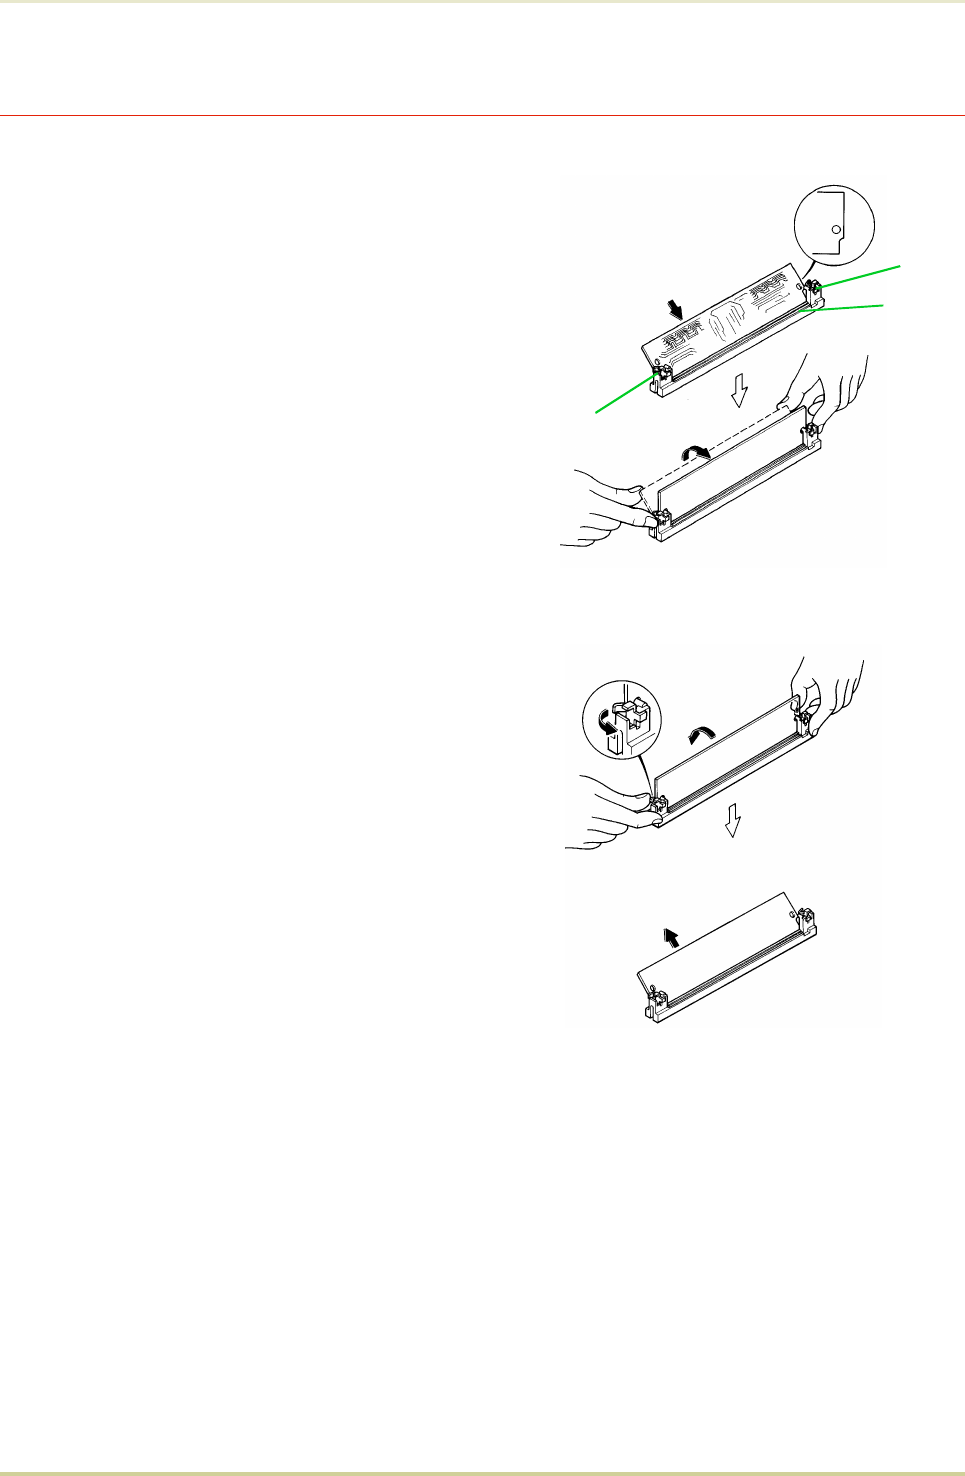
Installing and Removing SIMMs
Installing SIMMs
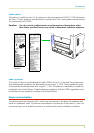
Insert the SIMM into the socket as shown
right.
1.
Insert the connector end of the SIMM
into the socket.
2.
Carefully push the board upright until it
snaps into place. Make sure that the
catches at the ends of the socket fit into
the holes at the ends of the SIMM board.
Removing SIMMs
To remove a SIMM, carefully pull the end
catches slightly outwards and tilt the SIMM as
shown, then pull the SIMM out of the socket.
Reverse the procedure under
Withdrawing the
Main Circuit Board from the Printer
to put the
main circuit board back into the printer.
Catch
Socket
Catch
SIMM
1.7. Memory Expansion Installation
1-26