Preparation for Usage
2-24
11
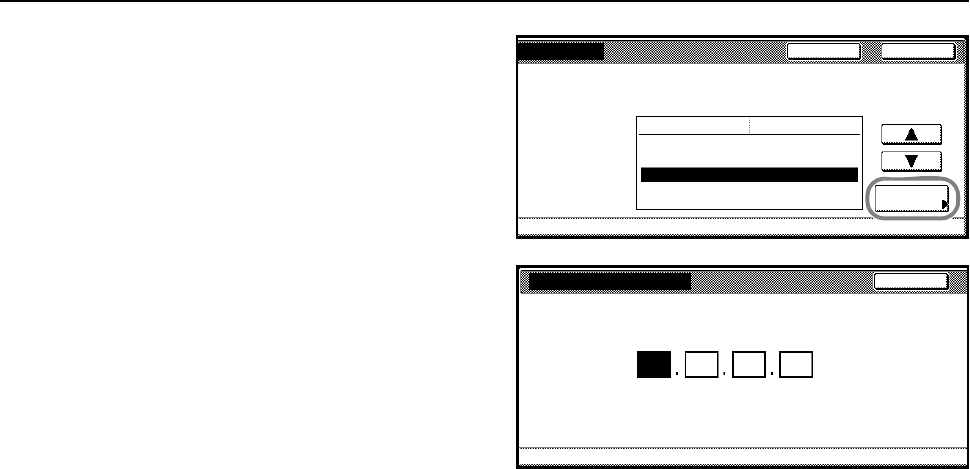
Press [S] or [T] to select IP Address
and press [Change #].
12
Enter the IP address using the numeric
keys. Input the address for the 3 digits
displayed in reverse black and white and
press the # key.
Verify the 3 digits entered # key.
13
Input the address for the next 3 digits displayed in reverse black and white and press the # key.
To correct an address entry, press the # key to select the 3 digit address you would like to correct
and reenter the address using the numeric keys.
14
After inputting the rest of the address in the same manner, press [Close]. The display returns to the
TCP/IP screen.
Press [Back] to delete the entered address and set the previous address.
15
Press [S] or [T] to select Subnet Mask and press [Change #].
16
Set the address in the same manner as Steps 12 - 14 to set the IP address.
17
Press [S] or [T] to select Gateway and press [Change #].
18
Set the address in the same manner as Steps 12-14 to set the IP address.
19
Press [Close] after all settings are complete.
20
Press [Close].
21
Press [Close]. The display returns to Printer mode.
Included Printer Utilities
This product includes the following printer utilities Install them as necessary. For details, refer to the
manual included with each utility.
• KM-NET for Clients
• KM-NET for Direct Printing
•IC-Link
• KM-NET VIEWER
• KM-NET VIEWER for Web Edition
•KM-NET KPrint
• KM NET Quick Setup
Change #
Close
DHCP On
BOOTP On
IP Address 0. 0. 0. 0
Subnet Mask 0. 0. 0. 0
Gateway 0. 0. 0. 0
Back
Setting Item Value
I
nterface - Network
IP Address
.10
(with #key)
Back
Printer menu- Interface - Network - TCP/IP
.0 .0 .0
Confirm per 3 lines pressing # key.


