Basic Operation
3-21
NOTE: If the scanner default setting for Selec. of senders (users) is set to [On], user number 001
will automatically be selected.
If a password was entered when the user was registered, the password input screen is displayed.
Input the password and press [Enter]. If the password is correct, the scanner settings screen is
displayed.
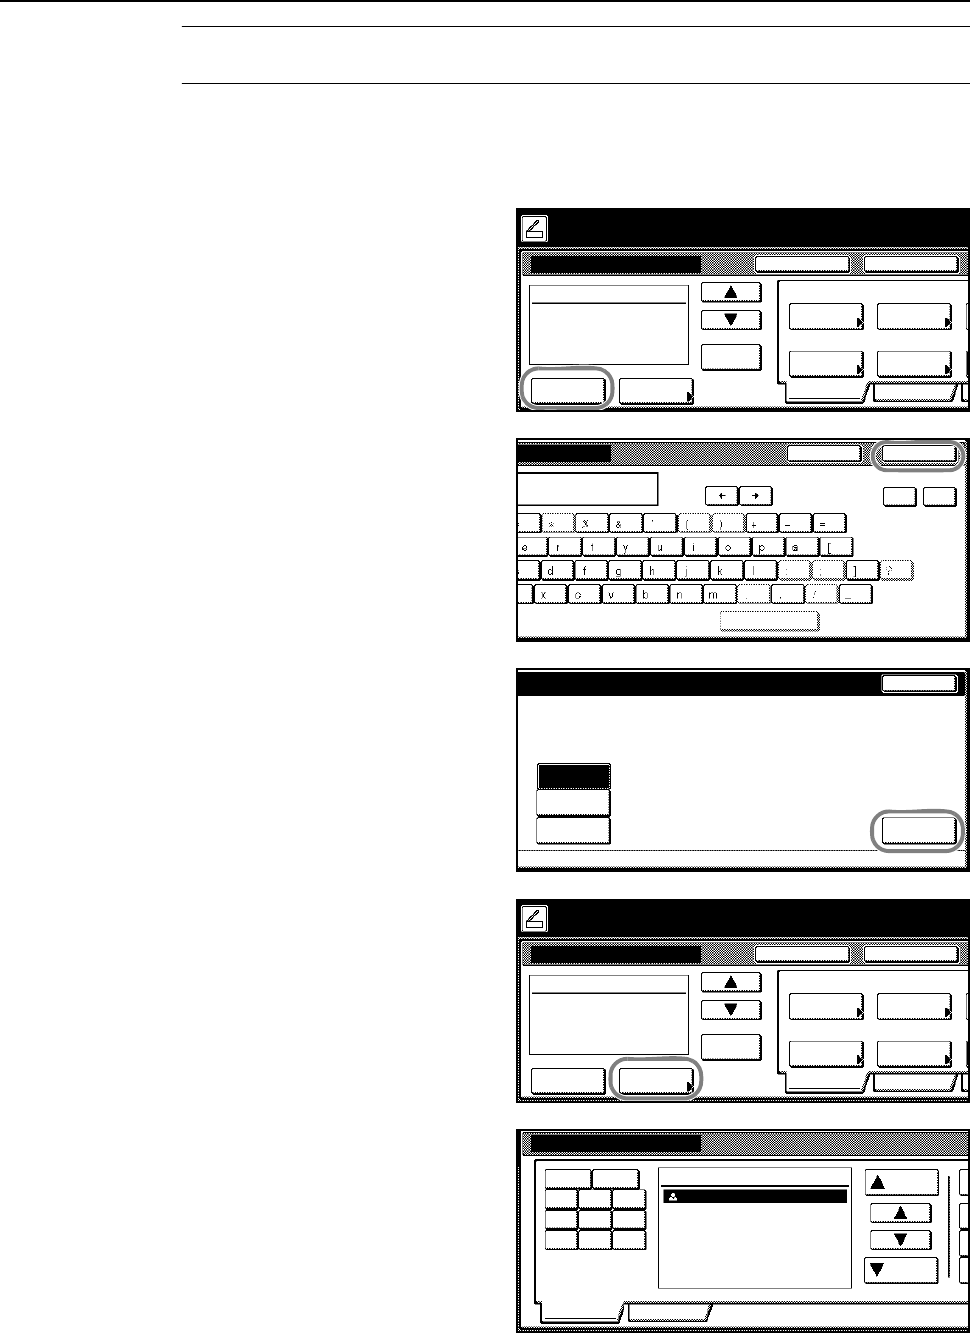
4
To input a mail address, press [Enter
dest.].
5
Enter the e-mail address for the
destination (recipient). After inputting,
press [End] to display the sending
method screen.
6
Select whether to send as [To:], [CC:], or
[BCC:] and press [Enter].
7
Press [Address Book] to use a private
address book or common address book.
8
Press [Common] ([Common book]) or
[Private] ([Private book]) to display the
destinations stored in the selected
address book. In this example a
destination is selected from the
Common Address Book.
Press [S] or [T] to select a destination
and select whether to send as [To:],
[CC:], or [BCC:].
When a destination is selected, an ⌧ is displayed next to it in the Select column to the right of the
Address column.
Place the original and select destination.
Send E-mail-Sending
Destination
Original
11×8½"
Address
Select
Auto
Scanning
Basic
Quality
Auto size
Select
Send Size
Top Edge
Orig. Set
08/0
8
Book
Orig.Size Direction
Resolution
Ready to scan. ( )Full-Color
Cont. TX toRegister Prgrm
200dpi
Enter
dest.
Delete
End
s
Space
Char.Limit:64 letters including #
Back Del.
Stop
d
of receiver. StopBack
To:
CC:
BCC: Enter
Place the original and select destination.
Send E-mail-Sending
Destination
Original
11×8½"
Address
Select
Auto
Scanning
Basic
Quality
Auto size
Select
Send Size
Top Edge
Orig. Set
08/0
8
Book
Orig.Size Direction
Resolution
Ready to scan. ( )Full-Color
Cont. TX toRegister Prgrm
200dpi
Enter
dest.
Delete
Address Book
Address
Up
Down
User A
Select:
Common Private
1.Symbol 0-9
ABC DEF GHI
JKL MNO PQR
STU VWX YZ


