


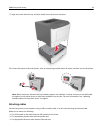


Installing the Wireless Setup Utility
1 Obtain a copy of the software installer package.
• From the Software and Documentation CD that came with your printer.
• From our Web site:
Go to
http://support.lexmark.com, and then navigate to:
SUPPORT & DOWNLOAD > select your printer > select your operating system
Note: The software installer package containing the Wireless Setup Utility is found in the drivers section.
2 Double‑click the software installer package.
Wait for the installation dialog to appear.
If you are using a Software and Documentation CD and the installation dialog does not appear, then do the following:
In Windows 8
From the Search charm, type run, and then navigate to:
Apps list > Run > type D:\setup.exe > OK.
In Windows 7 or earlier
a Click or click Start, and then click Run.
b In the Start Search or Run dialog, type D:\setup.exe.
c Press Enter or click OK.
Note: D is the letter of your CD or DVD drive.
3 Follow the instructions on the computer screen.
Launching the Wireless Setup Utility
Notes:
• Make sure the printer is turned on.
• Make sure a wireless network adapter is installed in your printer and is working properly.
1 Run the utility.
In Windows 8
From the Search charm, type printer home, and then navigate to:
Apps list > Printer Home > Settings > Wireless Setup Utility
In Windows 7 or earlier
a Click or Start.
b Click All Programs or Programs, and then select the printer program folder from the list.
c Select your printer, and then navigate to:
Printer Home > Settings > Wireless Setup Utility
2 Follow the instructions on the computer screen.
Additional printer setup 26