


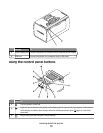


Press To
4
• Navigate through menu selections of the main menu.
• Navigate through selections of a submenu.
• When viewing photos, navigate from one photo to another.
5
• In a menu, enter submenus and perform actions.
• Select a photo being viewed on the display. Press again to deselect the photo.
• Eject paper. (Press for three seconds.)
6
• Navigate through submenus of a menu.
• When previewing a photo, decrease the number of copies to be printed.
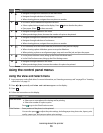
7
• Navigate through menu selections of the main menu.
• Navigate through selections of a submenu.
• When viewing photos, navigate from one photo to another.
8
• In a submenu, save the current selection, and return to the previous display.
• When viewing a photo slideshow, pause or stop the slideshow.
• When printing a photo or an alignment page, stop and cancel the job, and eject the paper.
9
• In the photo selection screen, bring up the Photo Edit Mode menu.
• In the Print Preview screen, bring up the Print Settings menu.
10
• Navigate through submenus of a menu.
• When previewing a photo, increase the number of copies to be printed.
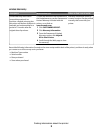
Using the control panel menus
Using the View and Select menu
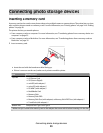
1 Insert a memory card or flash drive. For more information, see “Inserting a memory card” on page 20 or “Inserting
a flash drive” on page 21.
2 Press or repeatedly until View and Select appears on the display.
3 Press .
4 Follow the instructions on the display.
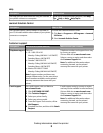
From here You can
View and Select
• Select one or more photos for viewing and/or printing
• Select the number of copies to print.
Press
to go to the Print Preview screen.
Print Preview See a preview of the photo/s to be printed.
You can also press
to adjust the print settings, including paper size, photo size, layout, print
quality, paper type, and passport photo print settings.
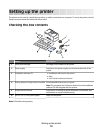
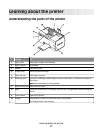
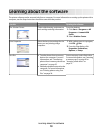
Learning about the printer
13