


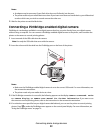


Editing photos
You can use the following paper types with your printer:
• Lexmark Perfectfinish Photo Paper
• Lexmark Photo Paper
• Photo/glossy paper
Notes:
• For best results, use Lexmark Perfectfinish Photo Paper or Lexmark Photo Paper.
• Do not use Lexmark Premium Photo Paper. Your print cartridge is not compatible with this type of paper.
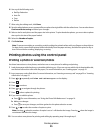
Cropping photos
1 Load photo paper with the glossy or printable side facing you. (If you are not sure which side is the printable side,
see the instructions that came with the paper.) For more information, see “Loading paper” on page 19.
2 Insert a memory card or flash drive. For more information, see “Inserting a memory card” on page 20 or “Inserting
a flash drive” on page 21.
3 Press or repeatedly until View and Select appears on the display.
4 Press .
5 Press to continue.
6 Press or to navigate through the photos.
7 Press to select a photo for printing.
8 Press .
The Photo Edit Mode menu appears.
9 Press or repeatedly until Crop appears at the bottom of the display, and the crop icon is highlighted.
10 Press .
11 Use the cropping tools shown on the display. Press or to select the tool and or to use the selected
tool.
12 Press to save your changes and go back to the Photo Edit Mode menu.
13 Press to go back to the photo selection screen.
14 Press or to select the number of copies to print.
Note: Pressing
when the number of copies is set to 1 will deselect the image. Pressing when the image is
not selected will select the image.
15 You can select more photos for printing and editing by repeating step 6 through step 14.
16 Press to go to the Print Preview screen.
17 If you want to adjust the print settings:
a Press .
b Make your selections.
Editing photos
30