


Setting the duplex option
26
Copying
Setting the duplex option
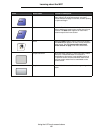
1 Place your original document in the automatic document feeder faceup, short-edge first.
2 Adjust the paper guides.
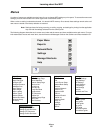
3 Touch Copy on the home screen.
4 Touch the button that looks the way you want your copies duplexed.
The first number represents sides of the original documents; the second number represents sides of the copy.
For example, select 1 --> 2-sided if you have 1-sided original documents and you want 2-sided copies.
5 Touch Copy It.
Reducing and enlarging copies
Copies can be reduced to 25% of the original document size or enlarged to 400% of the original document size. The default
for Scale is Auto. If you leave Scale set to Auto, the content of your original document will be scaled to fit the size of the
paper onto which you are copying.
To reduce or enlarge a copy:
1 Place your original document in the automatic document feeder faceup, short-edge first.
2 Adjust the paper guides.
3 Touch Copy on the home screen.
4 From Scale, touch + or – to enlarge or reduce your output.
Note: Touching Copy To or Copy From after setting Scale manually will turn the scale value back to Auto.
5 Touch Copy It.
Adjusting copy quality
1 Place your original document in the automatic document feeder faceup, short-edge first.
2 Adjust the paper guides.
3 Touch Copy on the home screen.
4 Touch Options.
5 Touch Content.
6 Touch the icon that best represents what you are copying (for example, Text, Text/Photo, Photograph, or Printed
Image).
• Text: Used for original documents that are mostly text or line art.
• Text/Photo: Used when the original documents are a mixture of text and graphics or pictures.
• Photograph: Used when the original document is a high-quality photograph or inkjet print.
• Printed Image: Used when copying halftone photographs, graphics such as documents printed on a laser
printer, or pages from a magazine or newspaper that are composed primarily of images.
7 Touch Copy It.