


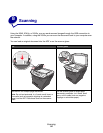


Scanning over a network
58
Customizing scan settings
1 Open QLINK:
• Double-click the QLINK icon on the desktop.
• Click Start
Æ All Programs Æ Lexmark Æ Lexmark X34x Series Æ QLINK.
2 Select the destination you want to scan to.
3 Click Edit.
4 Adjust the scan settings.
5 Click OK.
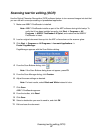
Scanning over a network
Note: Only available on the X342n connected to a network
1 Type the IP address of the MFP in the address line of your browser, and then press Enter.
If the Java applet screen appears, click Yes.
Note: The IP address can be found on the network setup page. For more information, see
Printing a network setup page (X342n only)
2 Click Scan Profile.
3 Click Create Scan Profile.
4 Select your scan settings, and then click Next.
5 Select a location for saving the scanned output file somewhere on your computer.
6 Enter a profile name.
The profile name is the name that will appear on the Scan Profile list on the MFP control
panel when the scan button is pressed.
7 Click Submit.
8 Review the instructions on the Scan to PC screen.
A shortcut number was automatically assigned when you clicked Submit. You can use this
shortcut number when you are ready to scan your documents.
a Go to the MFP, and place your original document in the ADF face up, long edge first.
b Press # followed by the shortcut number on the keypad, or touch Profiles on the home
screen.