


29
Chapter 7: Using The Router’s Web-based Utility
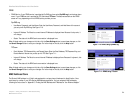
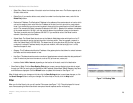
Port Triggering
EtherFast Cable/DSL Router with 8-Port Switch
• Application. Enter the name of the application.
• Start and End. Enter the number or range of external port(s) used by the server or Internet application. Check
with the Internet application software documentation for more information.
• Protocol. Select the protocol TCP or UDP, or select Both.
• IP Address. Enter the IP address of the server that you want the Internet users to be able to access. To find the
IP address, go to “Appendix C: Finding the MAC Address and IP Address for Your Ethernet Adapter.”
• Enabled. Check the Enabled box to enable the services you have defined. Port Range Forwarding will not
function if the Enabled button is left unchecked. This is disabled (unchecked) by default.
When finished making your changes on this tab, click the Save Settings button to save these changes, or click
the Cancel Changes button to undo your changes. For further help on this tab, click the Help button.
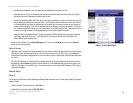
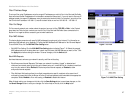
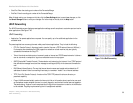
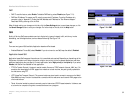
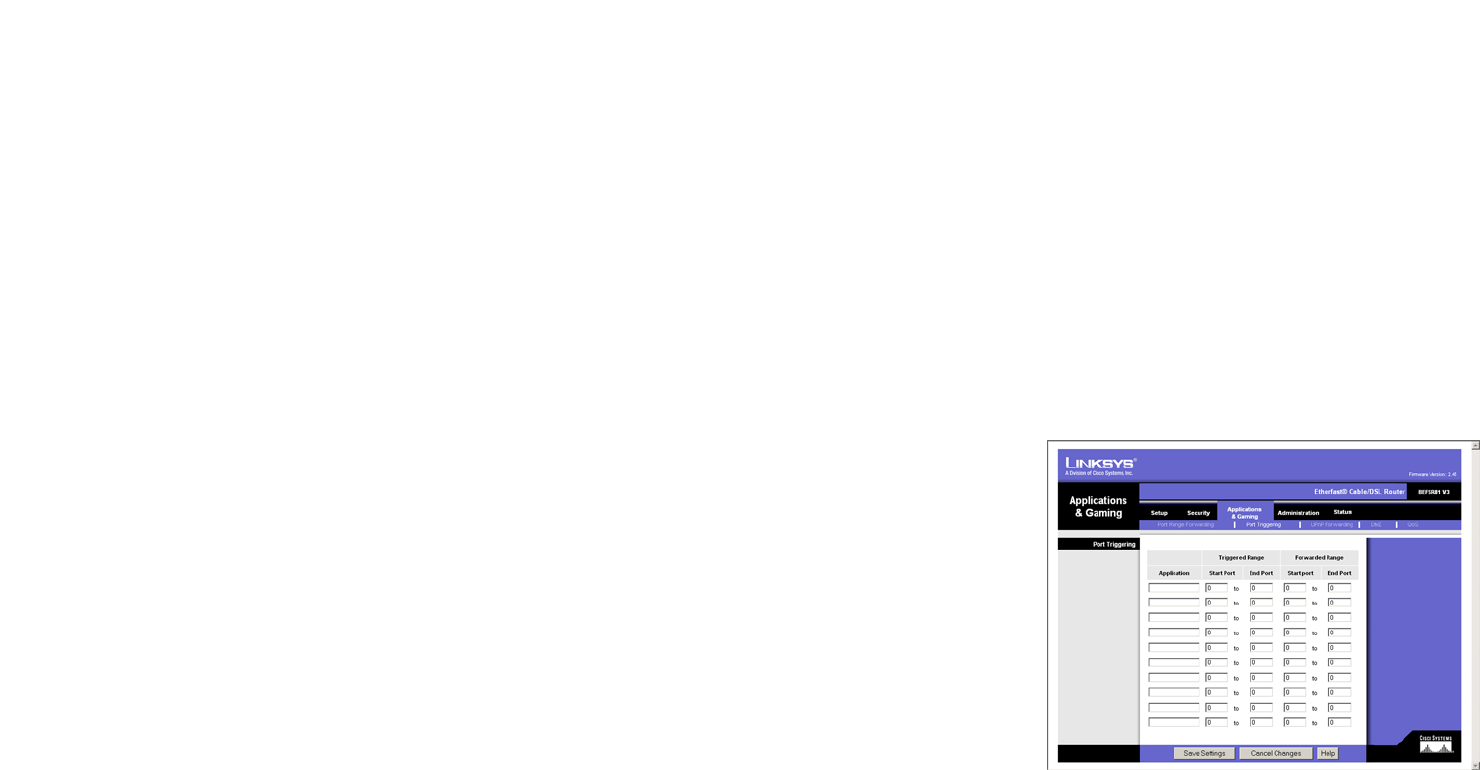
Port Triggering
The Port Triggering screen, as shown in Figure 7-19, allows the Router to watch outgoing data for specific port
numbers. The IP address of the computer that sends the matching data is remembered by the Router, so that
when the requested data returns through the Router, the data is pulled back to the proper computer by way of IP
address and port mapping rules.
Port Triggering
• Application. Enter the application name of the trigger.
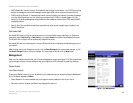
Triggered Range
For each application, list the triggered port number range. Check with the Internet application documentation for
the port number(s) needed.
• Start Port. Enter the starting port number of the Triggered Range.
• End Port. Enter the ending port number of the Triggered Range.
Forwarded Range
For each application, list the forwarded port number range. Check with the Internet application documentation for
the port number(s) needed.
Figure 7-19: Port Triggering