46
Chapter 8: Using the Compact Wireless-G Internet Video Camera’s Web-based Utility
View Video
Compact Wireless-G Internet Video Camera
View Video
Follow these instructions to view the Camera’s video.
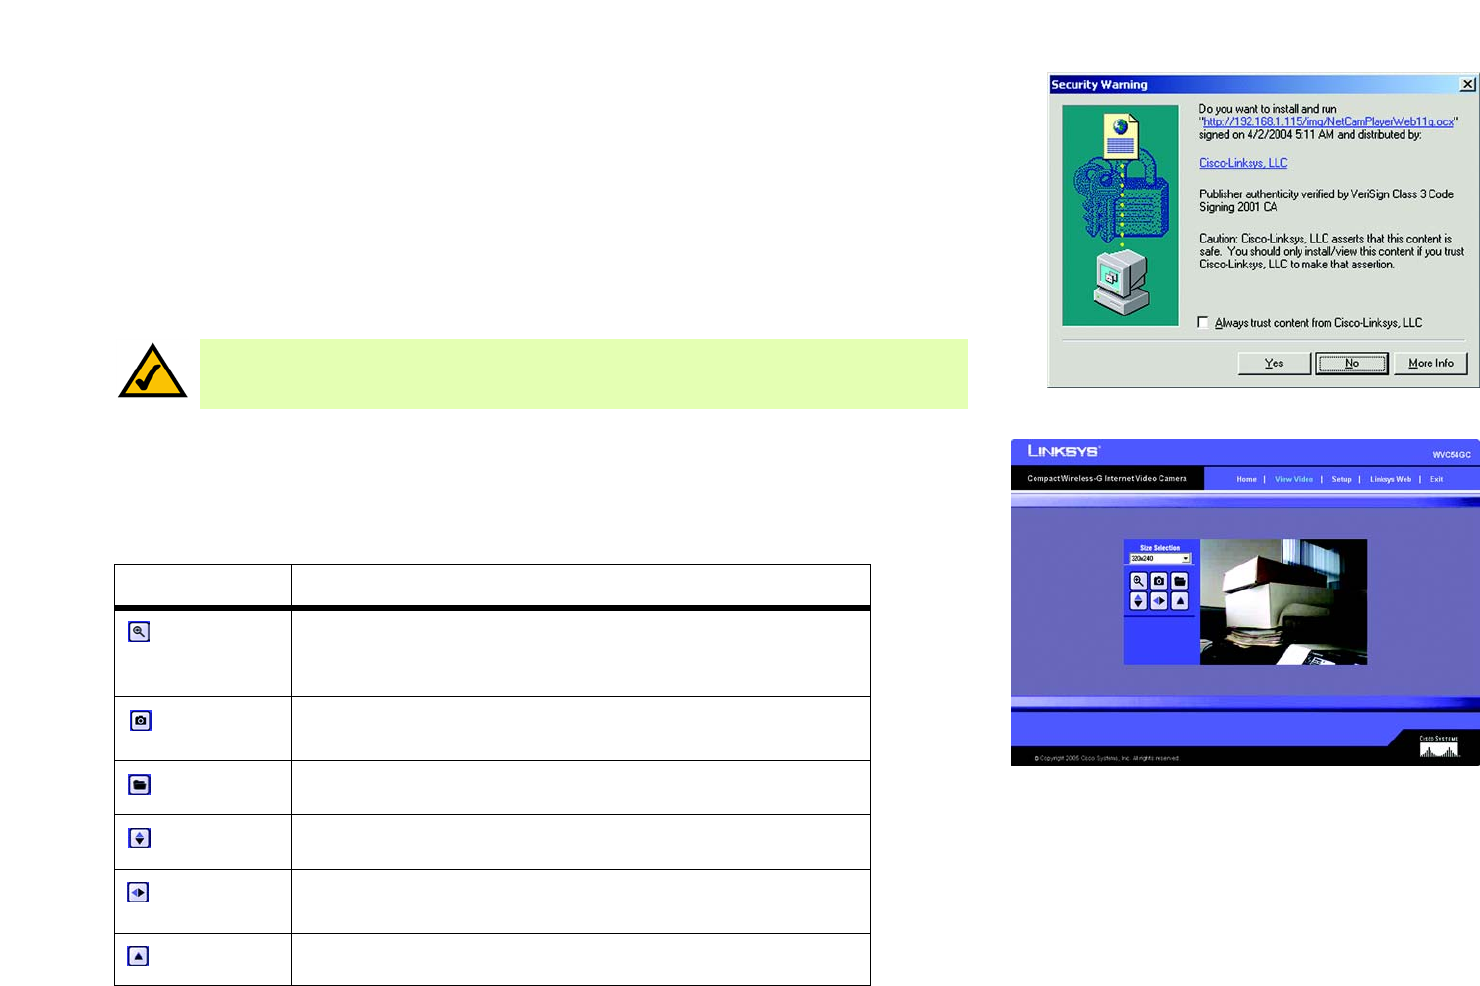
1. Click the View Video tab on the Welcome screen.
2. A Security Warning screen about an OCX plug-in may appear. To enable your computer to see the Camera’s
video, click the Yes button.
3. A screen will appear showing you the video from the Camera.
When viewing the Camera’s video, you can resize the image, zoom, take and save snapshots, and view the image
as a flip, mirror, or rotated image.
Size Selection. The default is 320 x 240. You can also resize the image; select 640 x 480 (digitally resized) or
160 x 128 from the drop-down menu.
Icon Function
A digital zoom feature is available. To zoom in on a section of the
window, click this icon. Then use your mouse to select the section you
want to magnify.
To take a snapshot of the current frame of video, click this icon. The
snapshot will be automatically saved in the designated folder.
To designate the folder where snapshots are saved, click this icon.
To view the image as a flip image, click this icon.
To view a mirror image (reversed left to right and vice versa), click this
icon.
To view the image as an image rotated 180º, click this icon.
Figure 8-3: Security Warning Screen
NOTE: To view video using a web browser, you must use Internet Explorer version 5.5 or higher. The
View Video feature will not work with Netscape. Netscape users should use the Multi-Camera Viewer
& Recorder Utility instead.
Figure 8-4: View Video Screen
