


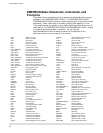


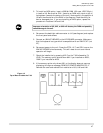
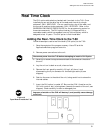

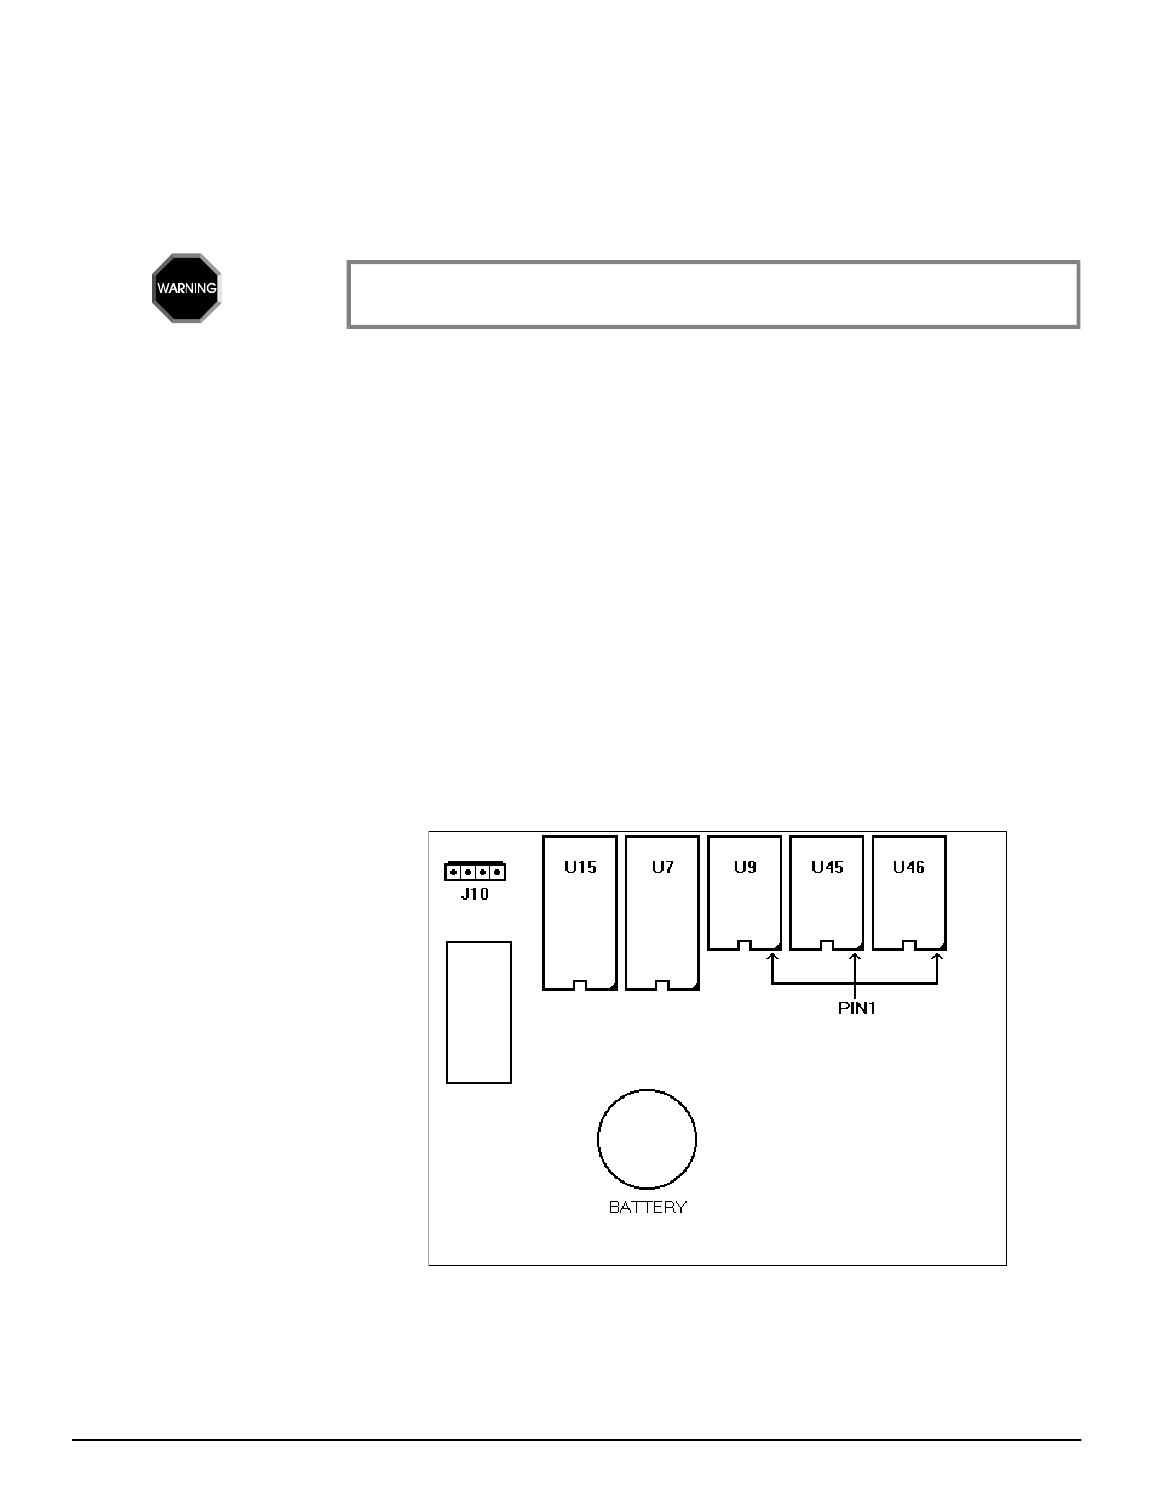
3. To install an MO2 option, insert a 256Kbit RAM (120 nsec, JDEC 32 pin)
in location U9. Be sure that PIN 1 (location on RAM with notch or dot) is
facing down (towards the center of the unit). Note carefully the position of
U9 and the orientation of the RAM in the diagram. Check carefully for
bent or damaged pins. If you are installing sn MO3 option, repeat the
procedure in locations U45 and U46.
Improper orientation of U9, U45, or U46 will destroy the RAM and possibly
cause damage to the unit.
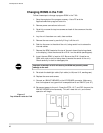
4. Re-connect the backlight cable connector to J10 (see diagram) and replace
the front panel and screws.
5. Connect an IBM KEYBOARD to the KEYBOARD connector. Make sure
that the keyboard is a type which is compatible with an IBM PC XT (not
AT).
6. Re-connect power to the unit. Press the CTRL, ALT and DEL keys on the
IBM KEYBOARD simultaneously. This will reset the unit and normal
operation will begin.
7. Check the installation by pressing HELP on the T-60 followed by F4
(SYS). The memory option should show 64K if you installed an MO2;
128K if you installed an MO3.
8. If the memory option only shows 32K, or the display does not come up
displaying the sign-on message, REMOVE POWER IMMEDIATELY.
Remove the cover and recheck the installation of U9, U45 and U46.
Figure 16
Top of Board Inside the T-60
64K Memory Option
Adding Memory Options to the T-60
47