


9-4 Upgrading Your Server
PREPARING FOR INSTALLATION AND REMOVAL
Follow the procedure below to prepare for installing or removing components.
1. Shut down the OS.
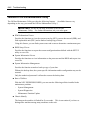
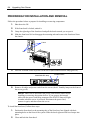
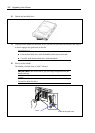
2. If the front bezel is locked, unlock it.
3. Grasp the right edge of the front bezel and pull the bezel towards you to open it.
4. Slide the front bezel left to disengage the mounting tabs and remove the front bezel from
the chassis.
1
2
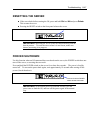
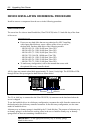
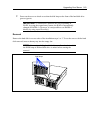
5. Press the POWER switch to power off the server (the POWER/SLEEP lamp goes off).
6. Remove all cables and power cords from the server (the AC Standby lamps on the front of
the server go off).
NOTE: Make sure to disconnect the power cord from the outlet before
installing or removing the option devices. If you remove the internal
cable with the power cord being connected, the STATUS lamp will light
in amber when the server is powered. Disconnect the power cord,
connect it again, and then restart the server.
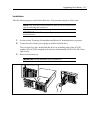
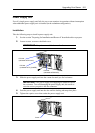
To install the front bezel, follow these steps.
1. Position the front bezel so the mounting tabs of the front bezel are aligned with their
mounting holes on the front of the system. Slide the bezel right until the bezel snaps into
place.
2. Close and lock the front bezel.
Unlock Lock
Frame
Tab
POWER switch
POWER/SLEEP lamp