


3-14 Setting Up Your Server
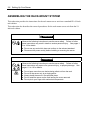
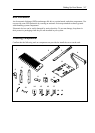
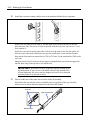
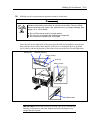
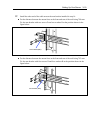
11. Fix the slide rail assembly with four screws C (two on each of the front and rear sides) and
four washers A (two on each of the front and rear sides).
NOTES:
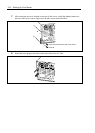
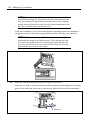
Make sure that the frame tips on the slide rail assembly are contact
to the rectangular hole frames of the rack properly and the four
screw holes of the rail can be seen through the mating rectangular
holes of the rack
Check that the slide rail assembly is located to the level.
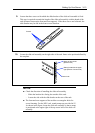
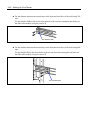
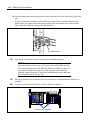
12. Fasten the screws loosen in step 9 to fix the slide bracket.
13. Install the other slide rail assembly on the left side of the rack in the same procedure as
that described by steps 9 to 12 above.
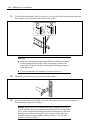
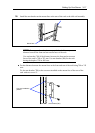
NOTE: Make sure that the slide rail assembly is installed at the same
level as the other slide rail assembly already installed. For installing the
server to the rack that has distance between the mount faces at the front
and rear faces of the rack being 743 mm or longer, fix the slide rail
assembly and arm stopper together with two screws C. (In this case,
washers A is not necessary.)