


4-12 Adding Expansion Devices
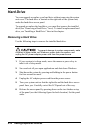
Hard Drive
You can upgrade or replace your hard drive without removing the system
unit cover. The hard drive is located on the right side of the system unit,
under the hard drive access panel.
To upgrade or replace the hard drive, you must first remove the installed
drive (see “Removing a Hard Drive,” next). To install a replacement hard
drive, see “Installing a Hard Drive” later in this chapter.
Removing a Hard Drive
Use the following steps to remove the installed hard drive.
To prevent damage to system components, wake
a system in sleep mode, exit Windows, power down the system, and
unplug the AC power adapter power cord from the power source.
1.
If your system is in sleep mode, move the mouse or press a key to
take it out of sleep mode.
2.
Save and exit all your open applications and shut down Windows.
3.
Shut down the system by pressing and holding in the power button
for four seconds or more.
4.
Unplug the AC adapter power cord from the power source.
5.
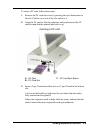
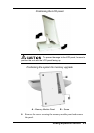
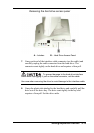
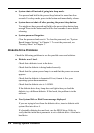
Turn your system unit so that the right side and the hard drive access
panel faces you. Carefully swivel the LCD panel out of the way.
6.
Release the access panel by pressing down on the two latches on top
of the panel (see the following figure for latch location). Set the panel
aside.