


Replacing consumable items> 83
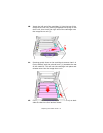
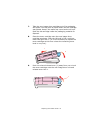
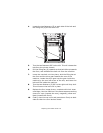
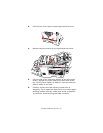
4. Locate the two fasteners (5) at each side of the belt and
the lifting bar (6) at the front end.
5. Turn the two fasteners 90° to the left. This will release the
belt from the printer chassis.
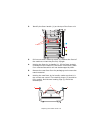
6. Pull the lifting bar (6) upwards so that belt tilts up towards
the front, and withdraw the belt unit from the machine.
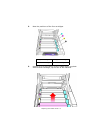
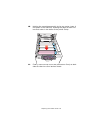
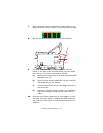
7. Lower the new belt unit into place, with the lifting bar at
the front and the drive gear towards the rear of the
machine. Locate the drive gear into the gear inside the
machine by the rear left corner of the unit, and lower the
belt unit flat inside the machine.
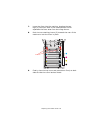
8. Turn the two fasteners (5) 90° to the right until they lock.
This will secure the belt unit in place.
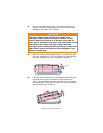
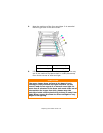
9. Replace the four image drums, complete with their toner
cartridges, into the machine in the same sequence as they
came out: cyan (nearest the rear), magenta, yellow and
black (nearest the front).
10. Finally, close the top cover and press down firmly at both
sides so that the cover latches closed.
5
6