82
4. Input/output signal settings
4-11. Setting the down-converter
Select the settings for the down-converter that is built into the SDI output board (option).
1
Press the [FUNC] button to light its indicator, and press the [IN/OUT] button to display the IN/OUT menu.
2
Turn [F1] to display the DownConv sub menu.
An asterisk () appears at the left of the parameter currently selected.
<Men
u display>
DownConv
Signal Scale Delay Sharp
15/15 OUT3
SQ
90H
1
OUT4
OUT5
OUT6
EC
LB
1F 1-5
3 Turn [F2] to select the output signal using the Signal item.
4
Turn [F3] to select the scaling system using the Scale item, and press the [F3] switch to enter the setting.
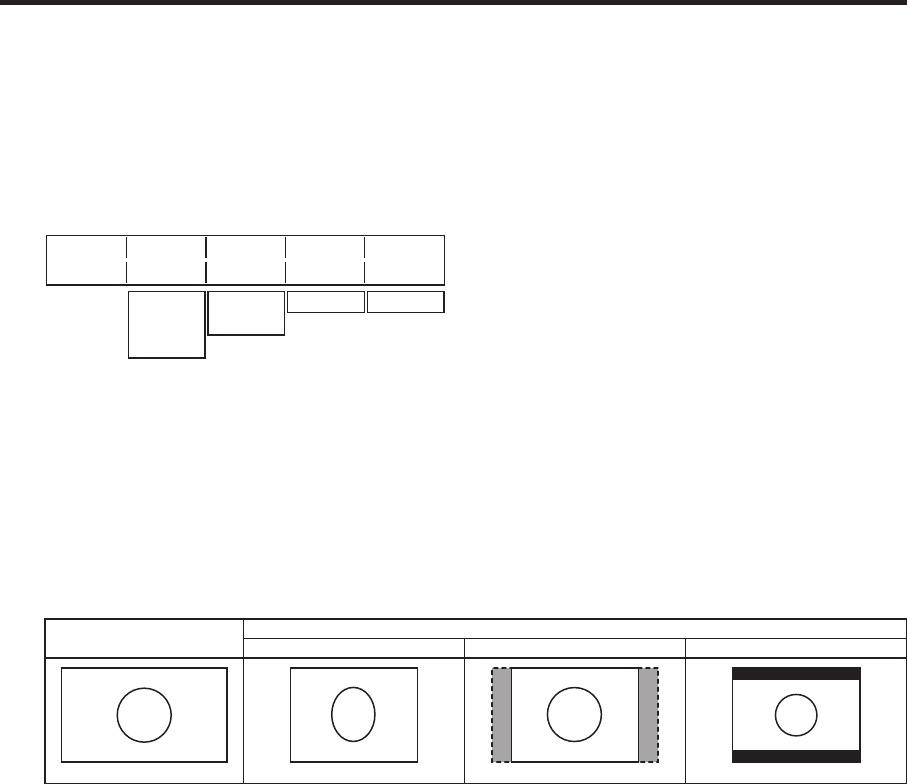
SQ (squeeze):
The top, bottom, left and right are reduced so that the aspect ratio is set to 4:3.
EC (edge crop):
The aspect ratio is maintained, the image is reduced in size in line with the vertical resolution, and it is
cropped at the left and right.
LB (letter box):
The aspect ratio is maintained, the image is reduced in size in line with the horizontal resolution, and a
black image is added at the top and bottom.
System image (HD)
Output image (SD)
SQ EC LB
5 Turn [F4] to set the delay time of the output using the Delay item, and press the [F4] switch to enter the
setting.
90H (75H):
When the system format is 1080/59.94i, the image is delayed from the system image (HD) by 90H, and
output.
When the system format is 720/59.94p, the image is delayed from the system image (HD) by 90H+1F
(frame), and output.
When the system format is 1080/50i, the image is delayed from the system image (HD) by 75H, and
output.
When the system format is 720/50p, the image is delayed from the system image (HD) by 75H+1F
(frame), and output.
When the system format is 1080/50i or 720/50p, “75H” is displayed on the menu.
1F:
The image is output in-phase with a delay of 1 frame from the system image (HD).
For details on the phase and delay amounts, refer to “4-6. Adjusting the output signal phase”.
6
Turn [F5] to set the degree of sharpness of the edges for the image using the Sharp item, and press the [F5]
switch to enter the setting.
1: Standard up to 5: sharper edges
For details on the other settings, refer to the operating instructions of the optional board.


