


137
WJ-HD100 SERIES CONTROL (TERMINAL MODE)
MUX
Digital Disk Recorder WJ-HD100 Series are operable with
the system controller, when the Multiplexer board is
installed in the unit.
Note: Before the use, it is necessary to install the Multi-
plexer board in the matrix switcher, connect the
matrix switcher to the digital disk recorder, and con-
figure the system through WJ-SX150A Administrator
Console, OSD SETUP MENU, and WJ-HD100 Series
SETUP MENU. [Refer to p. 32 Installing the
Multiplexer Board, p. 45 Connection with Digital
Disk Recorder WJ-HD100 Series, p. 63 WJ-SX150A
SETUP MENU (OSD), p. 79 WJ-SX150A ADMINIS-
TRATOR CONSOLE, and Displaying WJ-HD100
Series SETUP MENU in this page.]
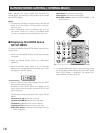
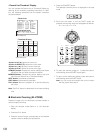
■ Displaying WJ-HD100 Series
SETUP MENU
The operations are the same as WJ-HD500 Series.
Refer to p. 130 Displaying WJ-HD500 Series SETUP MENU.
The following functions and buttons are valid in SETUP
MENU.
Joystick to R (B): Decrements a parameter
Joystick to L (A): Increments a parameter
■ Controlling Digital Disk
Recorder WJ-HD100 Series
The following are the operating procedures of WJ-HD100
Series via the system controller.
● Multiscreen Segment Switching
The operating procedure is the same as WJ-HD500 Series.
(Refer to p. 131.)
Note: 7-, 10-, or 13-segment multiscreen display is unavail-
able.
● Normal Playback
The operations are the same as WJ-HD500 Series. (Refer to
p. 131.)
Notes:
• You cannot skip to the previous/next record.
• Refer to WJ-HD100 Series Operating Instructions for
details and other playback modes.
● Manual Recording
The operations are the same as WJ-HD500 Series.
Refer to p. 132.
● Stopping REC ONLY Alarm
Recording
The operations are the same as WJ-HD500 Series. Refer to
p. 132.
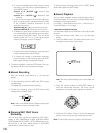
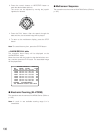
● Search Playback
You can search playback images using the ALARM
RECALL table or the SEARCH table.
Every time you press the INDEX button, the display will
change as follows.
Live image → Date-and-time entry form → ALARM RECALL
table → Live image
• Date-and-time Search Playback
The recorded images can be searched for through the date
and time.
1. Enter the recorder mode. (Refer to p. 131 Recorder
Mode.)
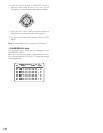
2. Press the INDEX button. The date-and-time entry form
will appear on the center of the monitor.
Note: The factory default setting is the current date and
time.
F2
INDEX
SEARCH
YYYY/MM/DD HH:MM
2002/05/07 19:32