25
• Adjustment procedure
t
e
c
r
p
e
e
a
l
t
c
e
n
s
S
E
E
:
:
:
R
E
U
T
N
N
E
E
M
n
o
i
t
a
n
z
o
i
i
n
n
e
t
e
o
o
g
a
r
r
i
a
m
u
h
t
u
r
t
c
c
g
o
c
n
n
n
f
i
y
u
a
n
P
S
F
L
I
t
t
e
c
s
p
e
u
a
l
j
c
e
d
s
S
A
E
:
:
:
U
N
E
M
e
notsyeK
01+
teseR
t
e
c
r
p
e
e
a
l
t
c
e
n
s
S
E
E
:
:
:
R
E
U
T
N
N
E
E
M
1
T
1
6
N
S
B
U
.
O
E
G
O
0
Y
R
x
0
1
y
T
+
a
U
e
l
O
d
p
o
s
f
1
M
i
f
B
n
D
O
G
n
o
R
o
i
n
p
/
e
i
s
e
m
P
N
n
t
s
e
a
Y
I
o
c
e
r
L
/
t
e
r
c
t
1
2
s
j
p
S
o
e
B
B
y
o
m
t
s
G
G
e
r
o
n
u
e
R
R
K
P
C
O
A
R
R
P
B
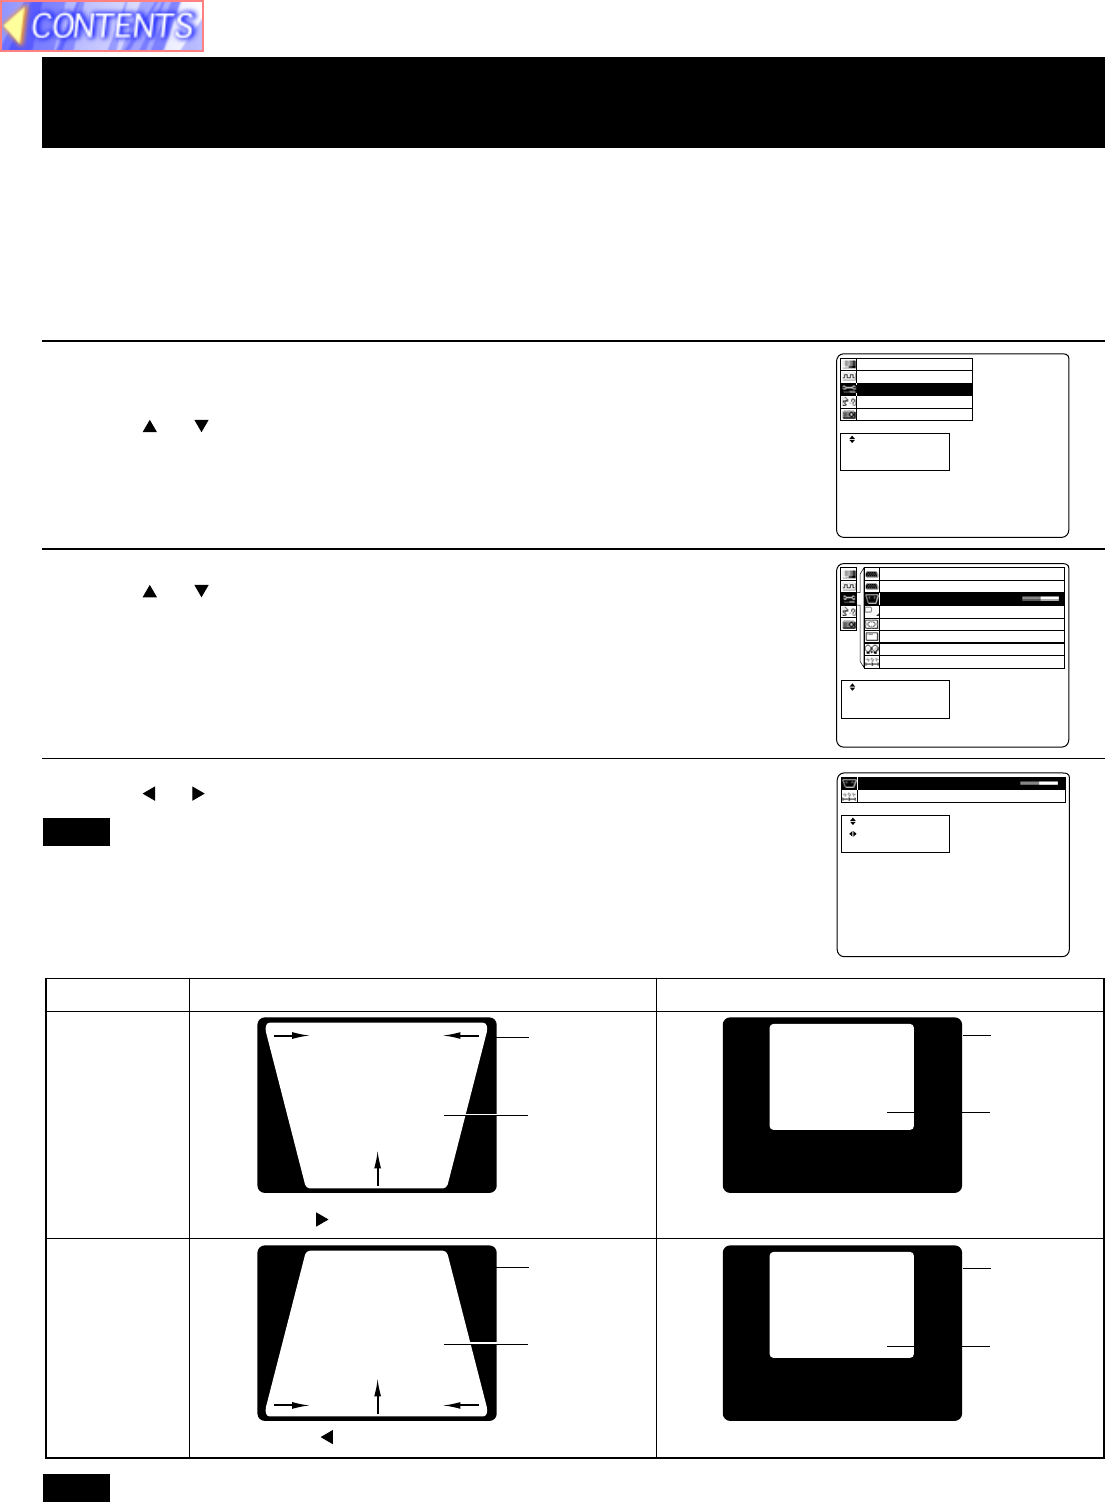
1 Press MENU to display the menu.
2 Press or to select “Function”, and then ENTER to
display the screen.
3 Press or to select “Keystone”, and then ENTER to
display the screen.
4 Press or to adjust the Keystone.
• The keystone distortion for the picture which is displayed can also be adjusted when the KEYSTONE button is
pressed.
• When keystone is corrected, the screen becomes smaller.
Keystone correction function
When the screen and projector are not level, a keystone (trapezoid) image may occur. This can be corrected by doing
the following.
The procedure and on-screen displays below are based on RGB as the input signal. (See page 17.)
Keystone
(top : wide)
Keystone
(under : wide)
Keystone Image Corrected Image
Press ... Top becomes narrow.
Press ... Bottom becomes narrow.
• Press MENU to remove the setup screen and menu.
• When reset is selected, adjustment values return to their factory default settings.
Screen
Projected
pictures
Screen
Projected
pictures
Screen
Projected
pictures
Screen
Projected
pictures
Note
Note
