41
System Configuration Example
Notes on system configuration
• Turn off the power supply of each system component before connecting any of the components.
• Read the instruction manual for each system component before connecting it.
• If the necessary cables for connecting any system components are not supplied with the component or available
as an option, you may need to fashion a cable to suit the component concerned.
• If there is a lot of jitter in the video signal input from the video source, the picture on the screen may flicker. In
such cases, it will be necessary to connect a TBC (time base corrector).
•
The Projector can be connected to video signal sources which out put VIDEO, S-VIDEO, analog RGB signals,
DVI-D signals [PT-L759XU] and Component signals (YP
B
P
R
signals).
• The Projector has built-in speaker. However, you will need to connect a separate audio system to the
AUDIO OUT terminal if your needs specify high sound volumes.
• It may not be possible to connect some types of personal
computer.
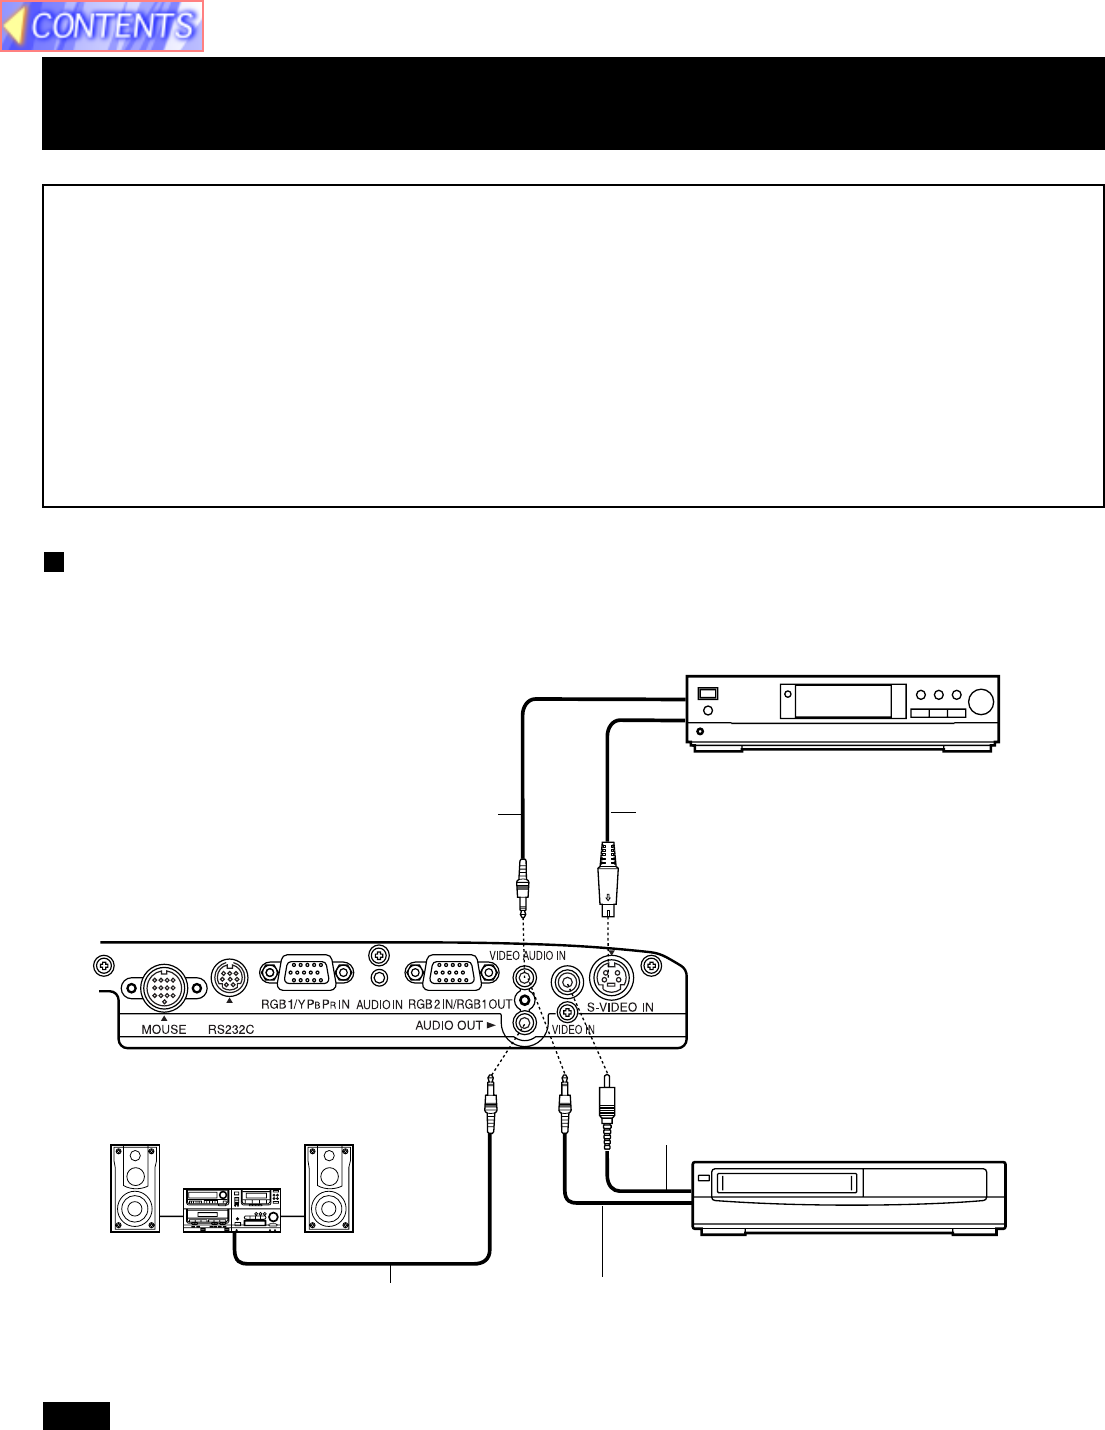
Example of connection to audio-visual equipment
Diagram numbers correspond with numbers (see page 44.)
• Only one audio signal input system is available for the VIDEO AUDIO IN terminals for S-VIDEO/VIDEO signals, so if
you wish to change the audio input source, you will need to remove and insert the appropriate plugs.
• If an audio system is connected to the AUDIO OUT terminal, muting can be controlled by the remote control which is
supplied with the Projector.
• If the video signal source is connected using a cable with a BNC junction plug, use the BNC-RCA Adaptor (not
included) to convert the pin jack.
VCR
S-Video Cable
(not included)
DVD player
Audio system
5 (Audio Cable)
5 (Audio Cable)
Connector jacks on left side of Projector
5 (Audio Cable)
6 (Video Cable)
Note


