


192
Downloading IOLAN Firmware
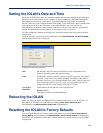
Resetting the IOLAN to the Default Configuration
The RESET button on the IOLAN allows you to reset the IOLAN to its Perle or custom factory
default configuration. The Power/Ready LED color and the resetting of the IOLAN default
configuration vary depending on how long you press and hold the RESET button, as shown in the
table below.
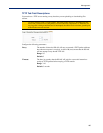
When you press and
hold the RESET
button for...
LED color IOLAN system status
Less than 3 seconds Blinking amber Reboots
Between 3 and 10
seconds
Blinking amber, then turns
solid amber when you
release the RESET button
Reboots and resets the configuration to the
factory default (either the Perle or custom
default configuration)
Over 10 seconds Blinking amber, then turns
solid amber when you
release the RESET button
Reboots and resets the configuration to the
Perle factory default configuration
Downloading IOLAN Firmware
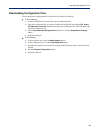
To upgrade the IOLAN firmware (software):
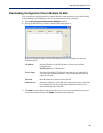
z In DeviceManager, select Tools, Advanced, Download Firmware to IOLAN. You can browse to
the firmware location. Once the firmware download is complete, you will be prompted to reboot
the IOLAN. You can choose to reboot the IOLAN at another time by selecting
Tools, Reset,
Reboot IOLAN.
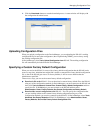
z In WebManager, under the Administration option, select Update Firmware. Either browse to the
firmware file and then click the
Upload button or configure the TFTP server and click the
Upload button. Note: If you use the TFTP option, the specified TFTP server must be on the same
subnet as the IOLAN.
Upgrading the firmware does not affect the IOLAN’s configuration file or downloaded custom files.
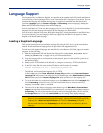
Calibrating I/O
All I/O channels are factory calibrated and should not need recalibration during initial use. However
should calibration be required, you can recalibrate in DeviceManager or WebManager. In
DeviceManager, you calibrate the I/O channel(s) by selecting
Tools, I/O Channels, Calibrate. In
WebManager, you calibrate the I/O channel(s) by selecting
I/O Channels, Calibrate.
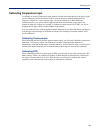
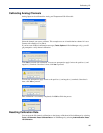
Calibrating Analog Input
To calibrate an Analog input channel, read the section that applies to the type of input you are
calibrating. Note that calibration will be done for the active channel configuration; for example, if
Channel A1 is set to voltage, you cannot calibrate it for current. The voltage range configured for this
channel will also dictate what is being calibrated. For example, if this channel is configured for a
range of +/-10V, calibrating this channel will calibrate all channels which are configured for +/-10V.
During the calibration process, you will be asked to apply the minimum and maximum configured
range value to the channel; for example, to calibrate for voltage +/- 10V, you will be prompted to first
apply -10V and then +10V to the channel.
Also, you cannot actively calibrate disabled channels (although, for Voltage, if you enable the
channel and then set it for a range that has already been calibrated for another channel, it will also be
calibrated).