


29
INSTALLATION AND ASSEMBLY
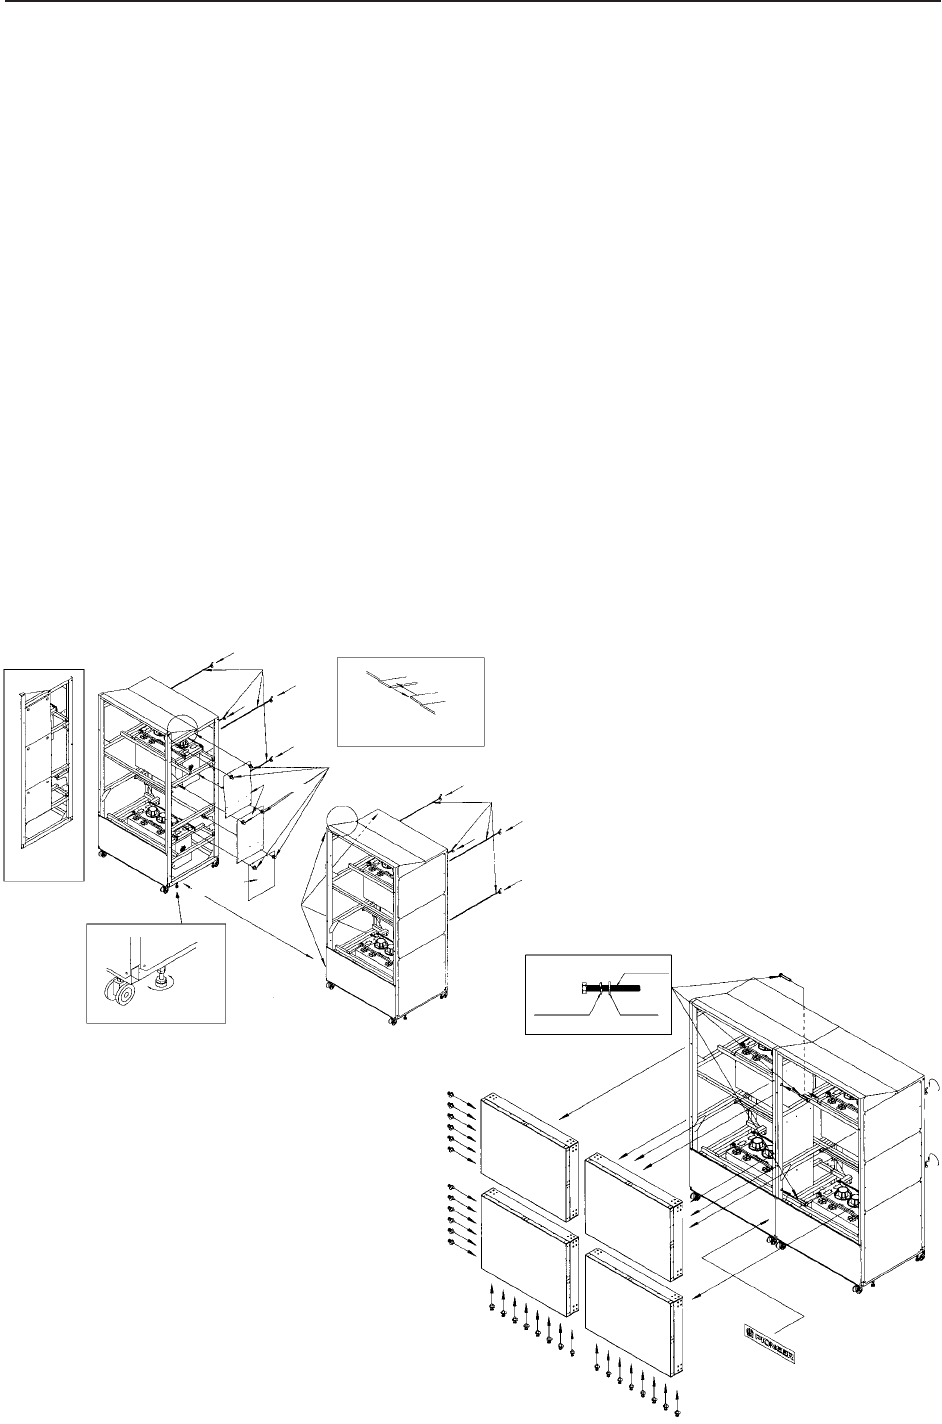
4. ASSEMBLING THE SYSTEM
(1) Assembling the system
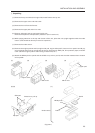
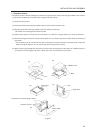
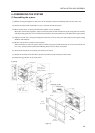
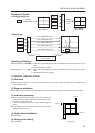
[1] Before moving the system to where it is to be installed, insert three Mickey bolts into the main unit.
[2] Secure the shield and the shield S to unit L with the scrivet (six parts).
[3] Move units R and L to the place where the system is to be installed.
Move the units closely together, adjust so that the levels of their frames are equal using the floor leveler,
and adjust the guide pins in front and back to the holes. (Four) Pay attention to the sides of the upper panel.
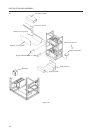
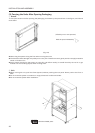
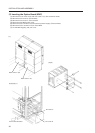
[4] Tighten units R and L using the hexagonal bolts (two in front and one at the back) containing the spring
washers and washers.
[5] Mount one screen at a time from the bottom.
Place the screen on the front panel, and then while one person holds the screen in front so that it does not
turn over, another person attaches the Mickey bolts from the back. (two parts)
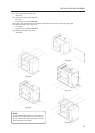
[6] The screen should be mounted by two persons as above.
[7] Attach the scrivets at the left side (12 parts) and bottom side (16 parts) of the screen.
[8] Paste the logo sticker on the front panel.
(Fig.3-7)
[1] [2] [3]
Mickey bolts
A
Floor leveler
A
Shield
Sides of the
upper pannel (A)
Mickey bolts
Guide
pin
Shield S
Scrivet (for shield)
Scrivet
(for screen)
Scrivet
(for screen)
Screen
Logo sticker
[4] [5] [6] [7] [8]
Hexagonal Bolt
Spring
washer
washer
Attaching
the shields