33
INSTALLATION AND ASSEMBLY
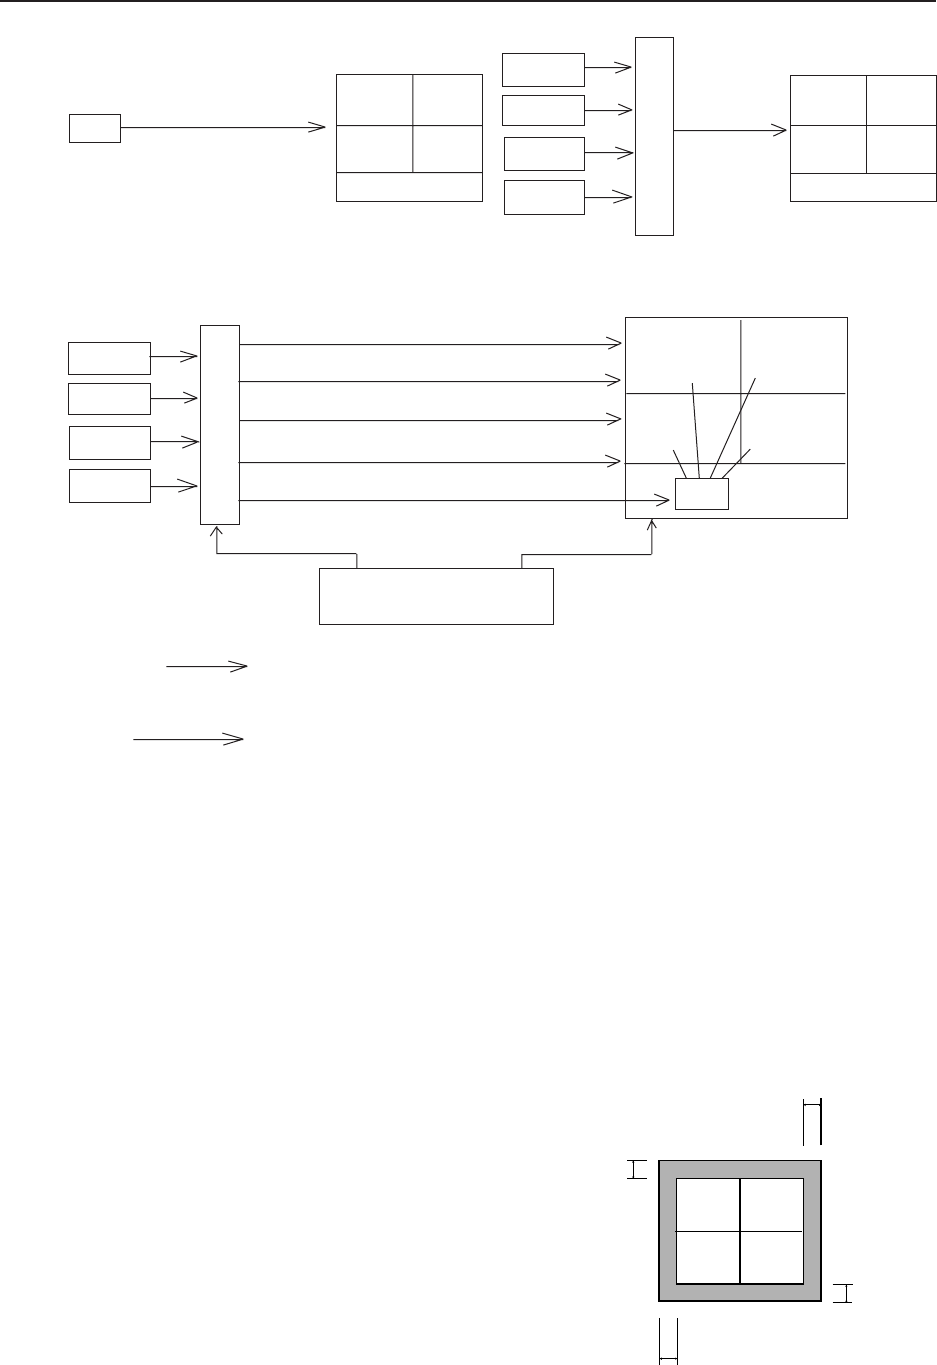
Examples of System
(1) Enlarged display only
LDP
C.VIDEO
To MVP input
RM-V1000NU/
RM-V1000NA
RM-V1000NU/
RM-V1000NA
LDP 1
LDP 2
LDP 4
C.VIDEO
To MVP
input
LDP 3
(2) Multi display
LDP 1
LDP 2
LDP 4
LDP 3
To C. VIDEO MPJ input
To C. VIDEO MPJ input
To C. VIDEO MPJ input
To C. VIDEO MPJ input
To C. VIDEO MVP input
MVP
5
5
5
5
RS-232C
RS-232C
To MPJ
Switching of Displays
¶ Enlarged display 1 Select the signal displayed by the matrix SW, and send the signal line to the
MVP.
2 Set the MPJ input to RGB.
¶ Multi display 1 Select the signal displayed by the matrix SW, and send the signal line of the
MPJ.
2 Set the MPJ input to C. VIDEO.
SW or selector, etc.
Matrix SW
Personal computer
for control
To each MPJ
RGB input
15 mm
15 mm
15 mm
(Fig. 3-15)
15 mm
5. SPECIAL INSTALLATION
(1) Wall inset
¶ When fixing the screen into the wall, leave space at the top, bottom, left and right sides for attaching and
removing the screen.
(2) Diagonal installation
¶ This system cannot be placed facing upwards or downwards and diagonally. Always place it horizontally.
(3) Architrave processing
¶ When enclosing the screen with a frame, etc., add 15 mm
to the dimensions of the assembled screen at the top, bot-
tom, left, and right. (Fig.3-15)
* Perform framing constructions after assembling the
screen.
¶ If light leaks from the rear space after constructions, place
a blind plate over the rear.
(4) Upside down installation
¶ Not possible
(5) Hanging from ceiling
¶ Not possible


