


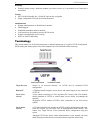

6 UST-IP USER MANUAL
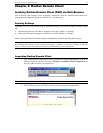
Initial Configuration
During initial configuration, the UST-IP Setup Wizard helps you quickly set up UST-IP for the first time.
The UST-IP Setup Wizard appears only when accessing the Administrative Menus on an unconfigured
UST-IP, and guides you through initial configuration parameters. The easiest way to perform this initial
configuration is by using the Local Admin Console (see ‘Physical Connection’ instructions in the previous
sections).
1. Power ON UST-IP via the power switch on the back of the UST-IP unit.
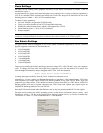
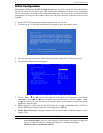
2. The Welcome to UST-IP Setup Wizard Screen will appear on the Local Admin Console.
3. Press the letter <B> on the Local Admin Console keyboard to begin the UST-IP Setup Wizard.
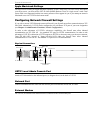
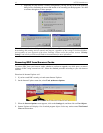
4. The Network Configuration Screen appears.
5. Use the <Tab>, <↑> or <↓> keys to select each line on the Network Configuration screen and the
<space bar>, or the <←> or <→> keys to toggle between available entries. Press the <Enter>, <Tab>
or <↓> keys when your entry on each line is complete. Below are descriptions of each field, and the
appropriate values to assign.
• Name: Designate a unique name for this UST-IP unit, for example, “MiamiDataCenter.” (NOTE: no
spaces; alphanumeric characters allowed?) The default name is UST-IP.
• Enable Ethernet Interface: Designates whether UST-IP should enable its Ethernet adapter as active
(default: YES).
Note: Network connections must be 10BASE-T or 100BASE-TX Ethernet
- Line Speed & Duplex: Enter the visual efficiency for the monitor: Auto detect 10 Mbps/Full
Duplex, 10 Mbps/Half Duplex, 100 Mbps/Full Duplex, or 100 Mbps/Half Duplex
- Obtain IP address automatically (DHCP):