


54 UST-IP USER MANUAL
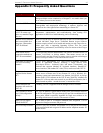
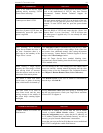
MOUSE PROBLEMS
SOLUTIONS
The larger UST-IP Mouse Pointer
does not track or is not in sync (not
aligned) with the smaller Target
Server Mouse Pointer.
Click Synchronize Mouse, or press <Ctrl-Alt-S>.
Ensure each Target Server uses a standard Windows mouse
driver.
For Windows 2000 based Target Servers, set the mouse motion
speed on each Target Server to the middle speed setting
between Slow and Fast and the mouse motion acceleration
speed on each Target Server to <None>. For
Windows ’95, ’98, and NT based Target Servers, set mouse
motion speed on each Target Server to slowest setting possible.
Click Auto-sense Video or simultaneously press <Ctrl-Alt-A>.
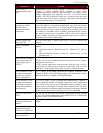
UST-IP is not accepting my mouse. UST-IP will not support a serial type mouse or non-standard
mouse drivers. It does support a PS/2 style mouse and standard
Windows mouse drivers. Other mouse drivers may function
with UST-IP, but will require extensive changes to the mouse
settings until a functioning mix of motion settings is found. If
you must use a mouse driver on a Target Server that is not
currently supported by UST-IP, try setting the mouse
acceleration to <none> and the mouse speed to <slow>.
UST-IP Mouse Pointer and the
Target Server Mouse Pointer do not
sync up in certain Windows NT
Administration screens, like the NT
log on screen.
Windows NT Administration or Log On screens may revert to
default mouse pointer motion/acceleration speeds. As a result,
mouse sync may not be optimal at these screens. If you are
comfortable adjusting the registry on the Windows NT Target
Server, you can obtain better UST-IP mouse sync at NT
Administration screens by entering the Target Server’s registry
editor and changing the following settings: default user mouse
motion speed = 0; mouse threshold 1 = 0; mouse threshold 2 =
0.
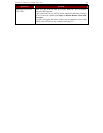
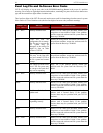
TARGET SERVER PROBLEMS SOLUTION
When I reboot a Target Server through
UST-IP, from a Remote PC, I cannot
access the Target Server’s BIOS. It
seems UST-IP is not accepting the
BIOS entry command keystroke.
To access a Target Server’s BIOS first temporarily de-select
the Sense video mode changes automatically checkbox in the
Video Settings window, accessed with Video Settings on the
UST-IP toolbar. Video auto-sensing slows remote viewing of
the reboot process and makes it difficult to send BIOS access
keystrokes to the Target Server from a Remote PC, because
auto-sensing tells UST-IP to work constantly to keep up with
the Target Server’s feverishly changing video screens during
reboot. De-selecting the auto-sense checkbox frees UST-IP to
accept and convey BIOS access keystrokes. It also aides in the
quick interpretation of rapidly changing video screens. Be sure
to re-select the checkbox when finished with BIOS access.