NovaJet PRO 600e User's Guide
2-4 Getting Started
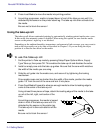
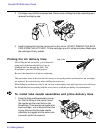
2 Press Load Media to move the media into printing position.
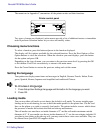
3 As printing progresses, media is looped down in front of the take-up core until it is
detected by the sensor on the printer stand leg. The take-up rolls then activate to roll
the media.
Be sure not to block the sensor!
Using the take-up roll
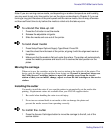
The take-up roll allows unattended printing by automatically winding printed media onto a core.
In this mode, the automatic cutter is disabled. When using this option, be sure that the media
sensor on the printer's right leg is not blocked.
Depending on the ambient humidity, temperature, and amount of ink coverage, you may want to
turn on the dryer and/or set a dry time as described in Chapter 3. If you are using the dryer,
position it so that the fans blow on the media.
➪➪
➪➪
➪ To use the take-up roll
1 Set the printer to Take-up mode by pressing Setup/Paper Options Menu, Supply
Type/Take-up, then press OK. This enables the take-up roll and disables the cutter.
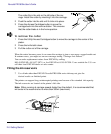
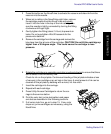
2 Install an empty core onto the take-up guides. Be sure that the core width matches
the width of the media you are using.
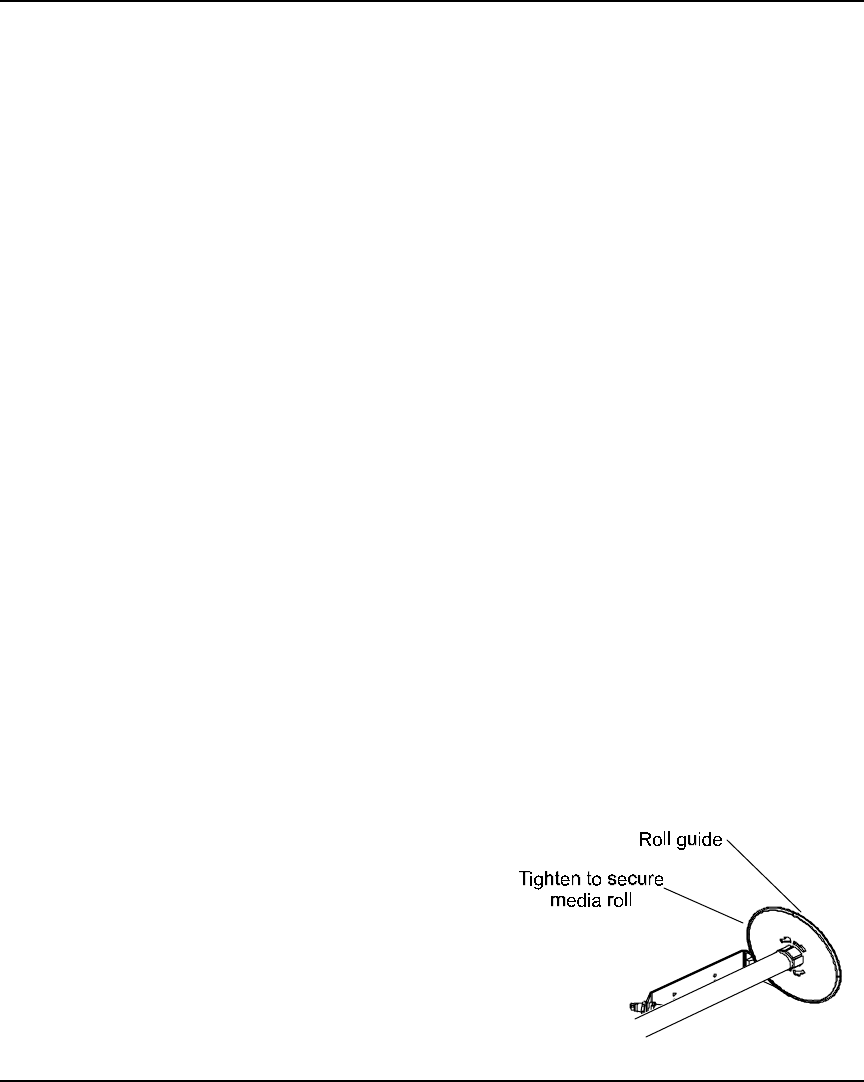
3 Slide the roll guide into the media core, and secure it by tightening the locking
mechanism.
Since media cores can be shorter than the width of the media, position the media
guide 1/8” from the end of the core and lock it into place.
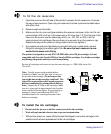
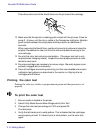
4 Press Feed Media/Forward to advance enough media to allow its leading edge to
come to the center of the take-up roll.
Using at least three pieces of tape, attach the leading edge of the media to the take-
up roll at the left, right, and center of the
core.
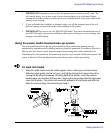
As printing progresses, the media is looped
down in front of the take-up core until it is
detected by the sensor on the printer leg.
The take-up roll is then activated to roll the
media.
Be sure not to block the sensor!


