


Part 3 Basic Operation
20
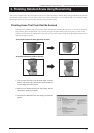
4. Saving Data
Saving in Dr. PICZA Format
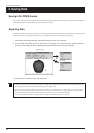
You can save scanning results in Dr. PICZA format. In Dr. PICZA3, go to the [File] menu and click [Save As]. In addition to Dr. PICZA3,
the 3D Editor program for editing 3D data can also open files in this format.
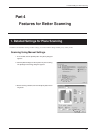
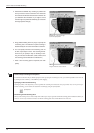
Exporting Data
In addition to Dr. PICZA format, you can save (export) scanning results in DXF format (3D surfaces), STL format (text or binary), or Point
Group format. These are commonly used formats, so you can make use of them to share data with other programs.
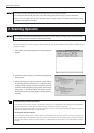
1. In Dr. PICZA3, click the [Export] button. Click the file format you want to use for exporting.
2. For STL format, select either text STL or binary STL, then click [OK]. For Point Group format, select the separator
character, then click [OK]. Select one supported by the program with which you want to share the data.
3. Type in the name of the file to export, then click [Save].
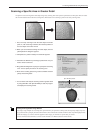
In addition to these, the LPX-250 also supports exporting in VRML format, 3DMF format, and (with some restrictions) IGES format. You
perform exporting in these formats using the 3D Editor program for editing 3D data.
When you export the results of multi-plane composition, a number of sets of scanning data are merged. When you view data with Dr.
PICZA3, however, to speed up the screen display time, this processing is not performed. There is nearly no difference in the display before
and after processing, but if you want to check the appearance after merging, open the scanned data in 3D Editor.
For more information about 3D Editor, see Part 5 and the 3D Editor User's Manual (electronic-format manual) .
STL format
Point Group format
[Export] button