


Part 5 Editing Scanning Results - Using 3D Editor
36
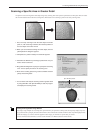
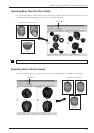
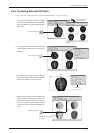
5. Click the [Move Object] button, then drag the portion you se-
lected to the left. The two parts separate. When you're done
with the operation, right-click to quit the [Move Object] mode.
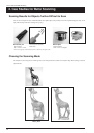
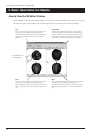
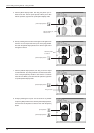
6. Now try orienting the cut surface of the apple on the right to face
the front. You can only do this when you're in the [Top] window.
First click the [Select Object] button, then click the right side of
the apple to select it.
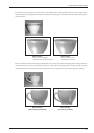
7. Click the [Rotate Object] button, then drag to turn the object
counterclockwise. Try turning it until the cut surface faces down.
Look at the [Perspective] window to see how the cut surface
faces the front. When you're done with the operation, right-click
to quit the [Rotate Object] mode.
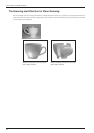
8. Finally, try deleting the cut part. You can do this in any window
except the [Side] window. First click the [Select Object] button,
then click the cut-off portion to select it. Then click the [Erase]
button.
Drag the object you
want to move.
[Rotate Object] button
[Select Object] button
[Move Object] button
Click this portion
to select it.
Drag to rotate.
[Select Object] button
[Erase] button