


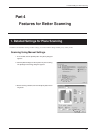

Part 4 Features for Better Scanning
26
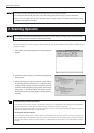
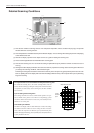
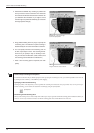
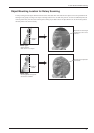
4. Hold down the SPACE key and drag to position the
area you want to rescan at the front. This makes the
front surface the direction of laser-beam emission. As
you determine the orientation, try to angle it so that
the laser light can penetrate sufficiently (or so that the
laser light passes through).
5. Drag (without holding down any keys) to specify the
rescanning area. The direction of plane scanning is
determined by the on-screen orientation at this time.
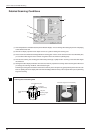
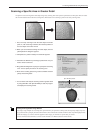
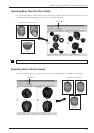
6. You can specify more than one rescanning area. To
do this, repeat steps 4 and 5. The scanning orienta-
tions are as you specify in step 5, resulting in scan-
ning in more than one direction. (Note, however, that
the scanning pitch is identical for all directions.)
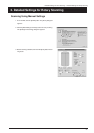
7. Enter a finer scanning pitch as required, then click
[Scan].
Drag to select the area to rescan.
SPACE key + drag left or right
to shift the perspective.
This executes rescanning.
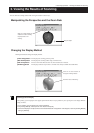
Shortcut Keys for Shifting the Perspective
You can also use the arrow keys to shift the perspective when specifying the rescanning area. Also, you can shift in parallel or zoom in or out
by holding down the CTRL key or the SHIFT key while dragging.
Specifying an Area and Rescanning
Clicking anywhere on the object after you have specified the rescanning area releases the area you specified. Also, even if you have per-
formed rescanning, you can return to the state before rescanning by using the [Undo] button.
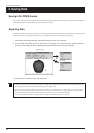
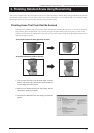
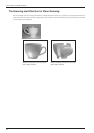
Rescanning and the Scanning Pitch
When you are creating a void, as in the example of the coffee cup, it may be a good idea to make the scanning pitch somewhat finer. When you
want to a void or cavity in detail, it is effective to make the scanning-pitch values smaller than the size of the void.
[Undo] button