


Installation
2 Installation
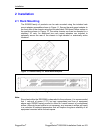
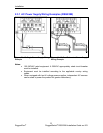
2.1 Rack Mounting
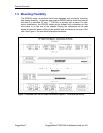
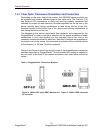
The RS2000 family of products can be rack mounted using the included rack
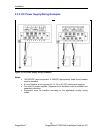
mount adapter assemblies shown in Figure 11. Secure the rack mount adapter to
the front sid
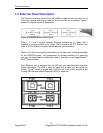
e of the chassis using the included black PAN head Philips screws in
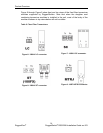
the positions shown in Figure 13. The entire chassis can then be mounted to a
standard 1
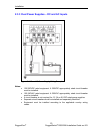
9” rack. An additional two rack mount adapters are included to
optionally secure the rear of the chassis in high-vibration or seismically active
locations.
Figure 11: RS2000 Family 19” Rack Mount Adapters
Figure 12: Rack mount adapter mounting location
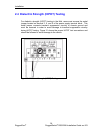
Note:
Since heat within the RSG2288 is channeled to the enclosure, it is recommended
that 1 rack-unit of space (1.75”) be kept unpopulated and free of equipment
above each RS2000 series product to allow for a small amount of convectional
airflow. Although forced airflow is not necessary, any increase in airflow will result
in a reduction of ambient temperature that will improve long-term reliability of all
equipment mounted within the rack space.
17
RuggedCom
®
RuggedSwitch
®
RSG2288 Installation Guide rev103