1-12
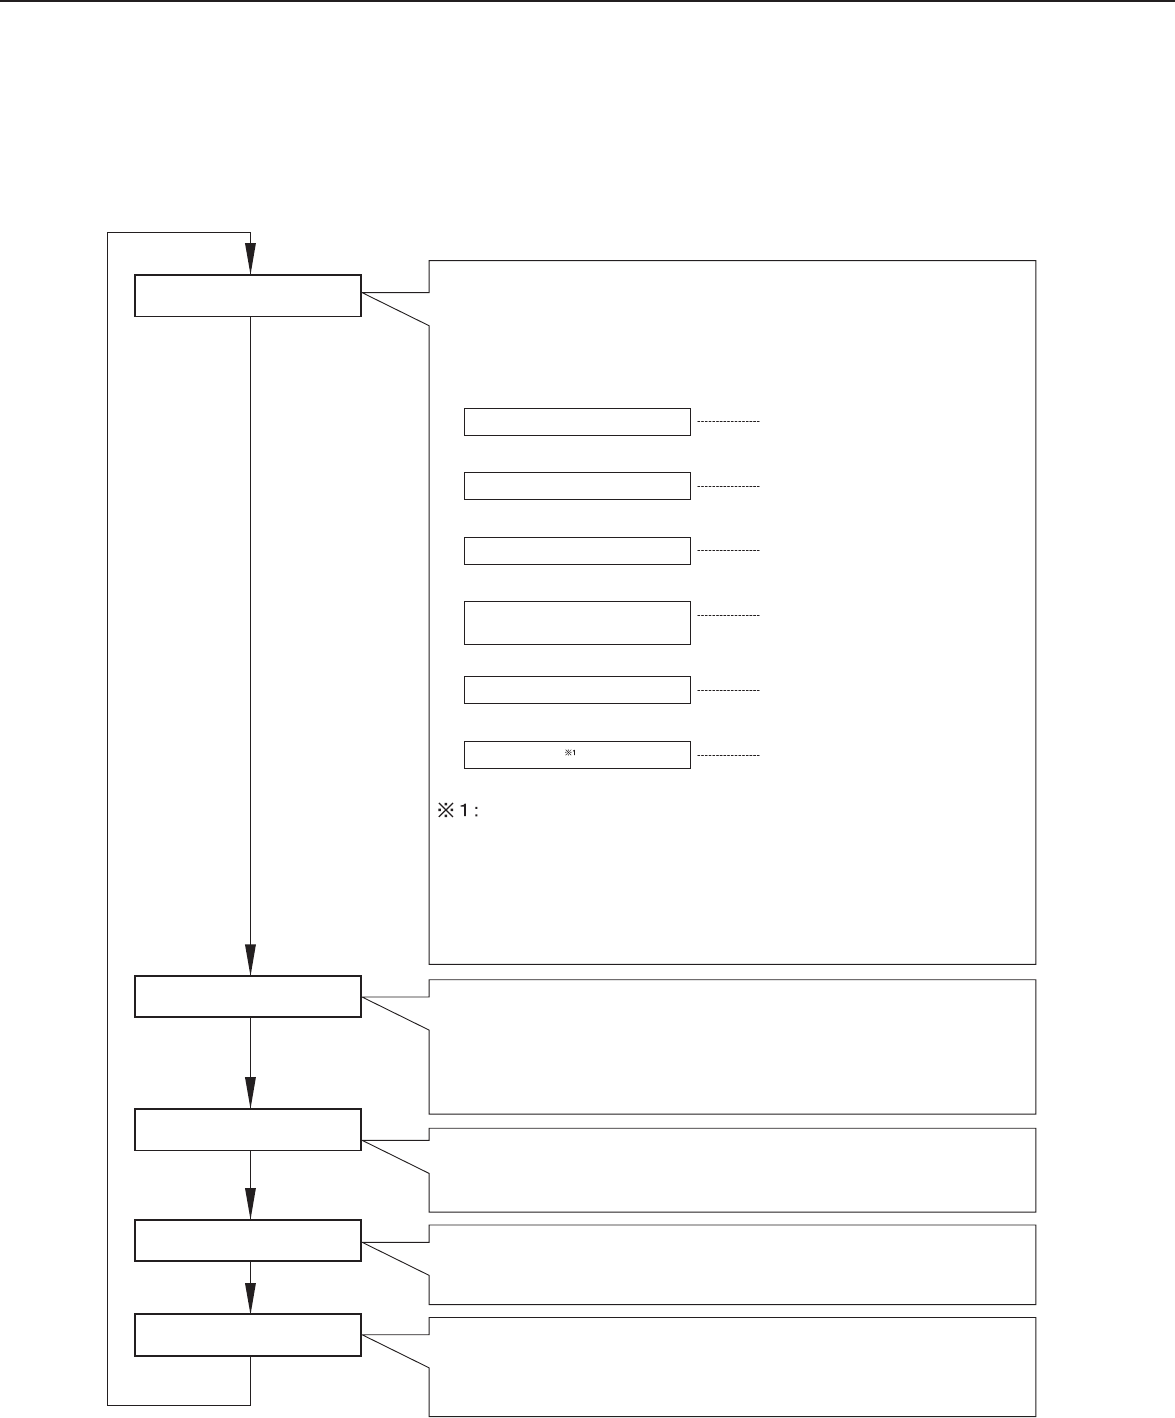
PRINT HOLD
CONDITION SETTINGS
CUSTOM SETTINGS
KEY OPERATOR
PROGRAMS
Job status screen
The message "WARMING UP" displayed when the power is turned on and
the list of the current job and the reserved jobs or the list of completed jobs
are displayed on the job status screen. Various messages are displayed on
the job status screen. Examples of messages are shown below.
(Display example)
[ADD PAPER] of status display
When the status display shows [ADD PAPER], the specified size
paper is not loaded. In this case, printing is suspended until paper
is loaded and another reserved job data will be printed if possible.
(If paper runs out during printing, another job data will not be
printed.) If you wish to change the paper size to resume printing,
see "Method of setting paper size and type" on page xxxx.
The printer is warming up to
allow printing.
The printer is ready to print.
The printer is currently executing
printing.
Toner runs out. Replace the
toner cartridge. (See page
xxxx.)
A misfeed has occurred. (See
page xxxx.)
Paper runs out. Load paper.
(See page xxxx.)
Print hold
If the job retention function is used from your computer, print data will
be stored in the printer as a hold job.
The job retention function can be used only if the printer is equipped
with a hard disk drive as a peripheral unit. (See page xxxx.)
Configuration settings
The printer configuration settings are used for basic printer settings.
(See page xxxx.)
Custom settings
Custom settings are used to make settings based on the conditions of
use of customers. (See page xxxx.)
Key operator programs
These are settings used by key operators (administrators of this
product). For the setting, see the "Key Operator's Guide". (See page
xxxx.)
[MENU] key
[MENU] key
[MENU] key
[MENU] key
[MENU] key
READY.
WARMING UP.
READY.
FROM TRAY #
CHANGE THE TONER
CARTRIDGE.
PAPER JAM.
ADD PAPER.
Menu group list and supplementary explanation of key operation (when
using the operation panel on the main unit)
The menu groups are classified into the following five groups as shown below. These menu groups are selected by
pressing the [MENU] key. If the [OK] key is pressed when the desired menu screen is displayed, a message indicating
required operation will appear.
PART NAMES AND FUNCTIONS


