


125
GB
Troubleshooting
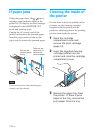
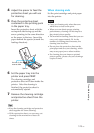
4 Adjust the spacer to feed the
protective sheet you will use
for cleaning.
5 Place the protective sheet
contained in the printing pack
in the paper tray.
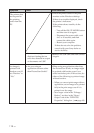
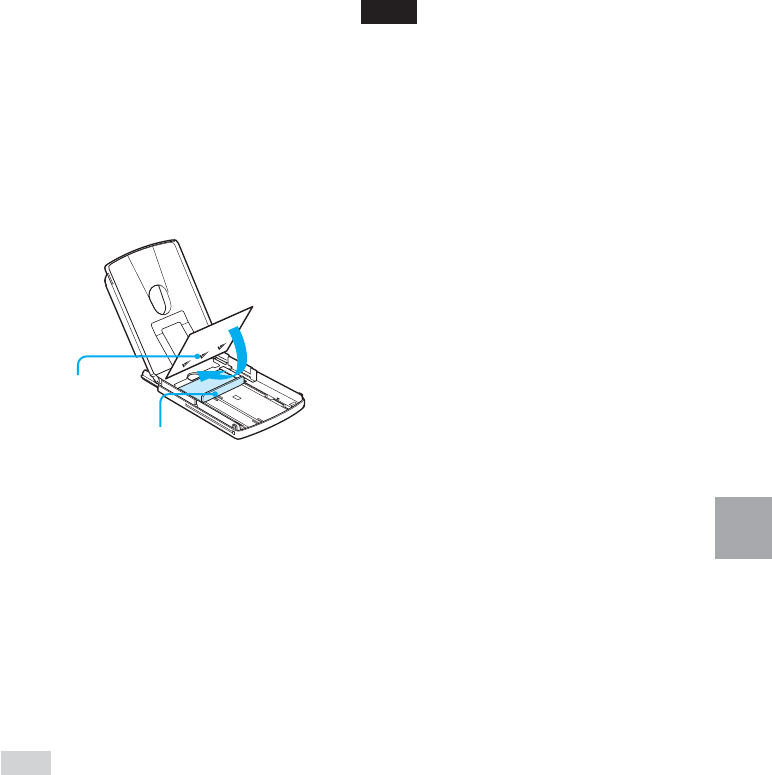
Insert the protective sheet with the
no-imprint side facing up and the
arrow pointing in the same direction
as the arrow in the tray. Insert the
paper behind the spacer (toward the
feeding direction).
6 Set the paper tray into the
printer and press PRINT.
The cleaning cartridge and
protective sheet will clean inside the
printer. After the cleaning is
finished, the protective sheet is
automatically ejected.
7 Remove the cleaning cartridge
and protective sheet from the
printer.
Tips
• Keep the cleaning cartridge and protective
sheet together for future cleaning.
• With a protective sheet, you can carry out
cleaning for the maximum of about 20
times.
When cleaning ends
Set the print cartridge and print paper
into the printer.
Notes
• Carry out cleaning only when there are
white lines or dots on the print.
• When you can obtain proper printing
performances, cleaning will not improve
the printed picture quality.
• The maximum cleaning times that you can
carry out is approximately 20. As the
number of cleaning times increases, the
cleaning loses its effect.
• Do not place the protective sheet on the
print paper and carry out cleaning, which
may cause paper jam or other troubles.
• If a cleaning does not improve printed
picture quality, please carry out cleaning a
couple of times.
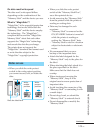
Arrows in the
reverse side
Spacer